Real-Time Scalable GraphQL and JAMstack with Gatsby, Hasura, and YugabyteDB
June 17, 2020
JAMstack is a new way of building websites and apps. It’s not a technology but rather an architectural pattern that is growing in popularity. In JAMstack, the JAM acronym stands for JavaScript, API, and Markup, and the main idea behind the technology is that web applications don’t have to rely on the application server to be fully functional and robust.
There are four primary benefits of adopting a JAMstack architecture.
- Higher performance driven by efficient use of static assets and Content Delivery Networks (CDNs).
- Stronger security resulting from the delegation of server-side and database operations to other expert teams.
- Cost-effective scaling that is easier to manage than running dedicated servers.
- Better developer experience that results from reduction of bloated application logic.
The popularity of JAMstack has risen along with the wide adoption of static site generators, one of which is GatsbyJS. In this post, we will show you how easy it is to get started with JAMstack, Gatsby, and a distributed SQL database on the backend, in order to quickly build and deploy a modern site that easily scales. To get started, we will use a Gatsby starter template to create a basic blog site. To do so run
npx gatsby new gatsby-starter-blog https://github.com/gatsbyjs/gatsby-starter-blog
There is a lot of content out there on various aspects of Gatsby, but in this blog I will focus on three main things:
- Adding dynamic functionality to a Gatsby site using GraphQL subscriptions
- Creating a GraphQL CRUD backend using Hasura engine that will support these subscriptions
- Scaling the database tier powered by Hasura using YugabyteDB, a PostgreSQL-compatible distributed SQL database
Let’s start from the third bullet point and work towards the first.
Setting up YugabyteDB as our database
So what is YugabyteDB and why should we definitely consider using it? I wrote a blog post describing why YugabyteDB is a great fit to run Hasura on top of it so you are welcome to check it out.
In a nutshell, with YugabyteDB we have a distributed SQL database with built-in sharding/rebalancing and fault-tolerance mechanisms. We have multiple nodes in a database cluster and if one of these nodes is down, data is still intact because it is always automatically replicated across multiple nodes.
Let’s see it in action. We will start by setting up YugabyteDB on macOS following the official tutorial, or you can follow my blog post about YugabyteDB as well.
When we have everything configured, we can create our YugabyteDB cluster by running
./bin/yb-ctl --rf 3 start
In our example, we will use the fact YugabyteDB is compatible with the SQL dialect and wire protocol of PostgreSQL, which means Hasura can run on top of it pretty easily. If you are not familiar with hasura.io, you can check out a blog post I wrote about Hasura.
Now it’s time to set up Hasura and run it on top of our freshly created YugabyteDB cluster. Instead of using Heroku as a hosting platform with the PostgreSQL addon, as advised in the official Hasura docs quick start, I will start with the Docker compose example and alter it to run with YugabyteDB. The alteration will basically be removing the PostgreSQL container section from the docker-compose.yaml file and changing the database to be:
postgres://postgres:@host.docker.internal:5433/yugabyte
Alternatively, you can just create a blank docker-compose.yaml file in the Gatsby project root folder and paste the following code:
version: '3.6'
services:
  graphql-engine:
    image: hasura/graphql-engine:v1.1.0
    ports:
    - "8080:8080"
    restart: always
    environment:
      HASURA_GRAPHQL_DATABASE_URL: postgres://postgres:@host.docker.internal:5433/yugabyte
      HASURA_GRAPHQL_ENABLE_CONSOLE: "true" # set to "false" to disable console
      HASURA_GRAPHQL_ENABLED_LOG_TYPES: startup, http-log, webhook-log, websocket-log, query-log
volumes:
  db_data:
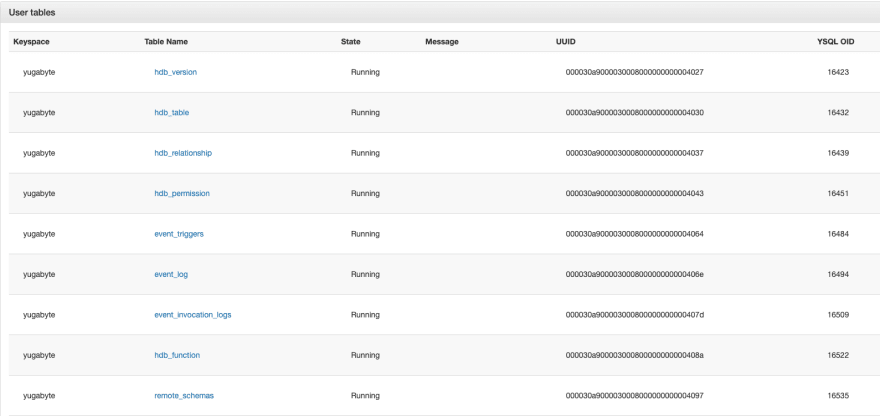
Now you can run docker-compose up -d in the project root folder to bring up your Hasura container. You will be able to access localhost:8080/console and see that it’s loading. Also, you can access Yugabyte admin UI on localhost:7000 and see that there are a bunch of Hasura specific tables that have been created, such as hdb-catalog and more.
Before jumping into data modeling, we need to make sure that when you model the data, you can track database changes, relationships, etc.
Using Hasura CLI and migrations
The Hasura CLI is a command line tool for managing Hasura projects and migrations. We will use this tool to create migration files whenever we make any changes to the console, so, later on, you will be able to just create your own cluster after forking the repo and running hasura migrate apply.
When you do so, Hasura will create all needed tables, apply migrations, and so on. It will look like this:
![]()
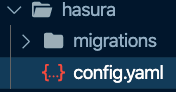
I will start by running hasura init inside the project root folder. The CLI will ask me what name I should call my Hasura project. For this example, I will stick with the defaults.
As a result, I will have a Hasura folder with the config.yaml file created inside.
Now it’s time to run the Hasura console through the CLI.
cd hasura
hasura console
That command will open the Hasura console on https://localhost:9695/ and will keep track of any changes that I will do through the console. Any changes will be written to disk as a migrations file that I can later commit to my GitHub repo.
For example, If I create a users table through the Hasura console, it will generate .up and .down migrations:
- args:
    cascade: false
    read_only: false
    sql: CREATE TABLE "public"."users"("id" text NOT NULL, "name" text NOT NULL, "email"
      text NOT NULL, PRIMARY KEY ("id") );
  type: run_sql
- args:
    name: users
    schema: public
  type: add_existing_table_or_view

- args:
    cascade: false
    read_only: false
    sql: DROP TABLE "public"."users";
  type: run_sql
Modeling our data
Now it’s time to create tables through the Hasura console.
We will create a users table in the Hasura console:

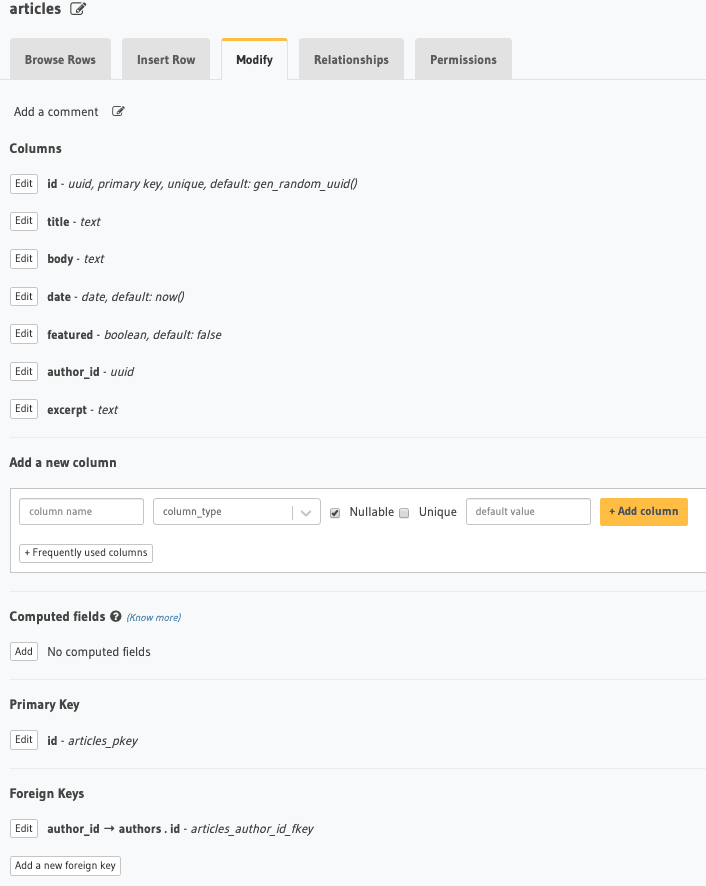
Next we will create the articles table. For this table we will set up a user_id field to be a foreign key and point to the users table.
Next we will create the authors table, which will have more author specific information and will be connected to the users table through the user_id foreign key.
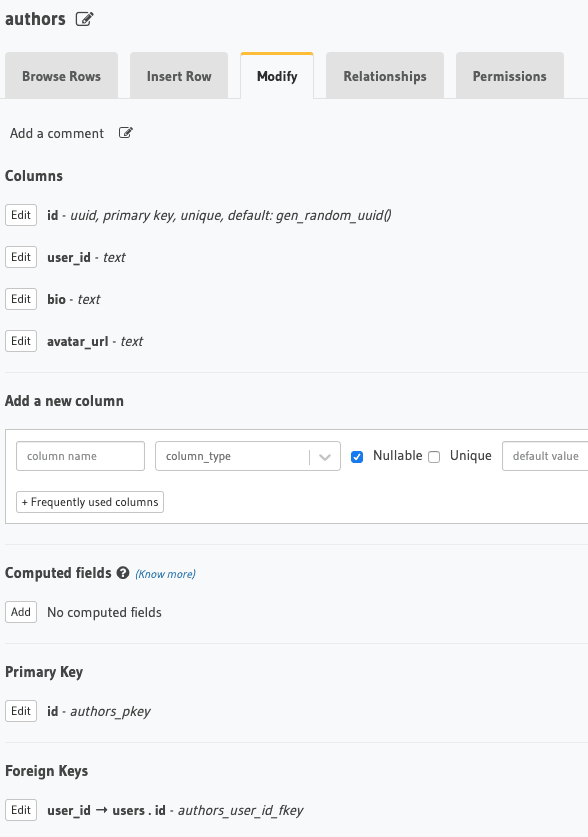
The reason to differentiate between users and authors is that later we want to add authentication to our Gatsby site. All users will be able to see articles, but not everyone will be an author.
Rendering static data from our GraphQL API
So now that we have Hasura and our database set up, we need to connect Gatsby to render the static data that we have in the database.
For that, I will use the gatsby-source-graphql plugin. Let’s install it with
yarn add gatsby-source-graphql
After installing it, I need to add its configuration to my gatsby-config.js file:
{
      resolve: "gatsby-source-graphql",
      options: {
        typeName: "hasura",
        fieldName: "blog",
        createLink: () => {
          return createHttpLink({
            uri:
              "https://localhost:8080/v1/graphql"
            fetch,
          })
        },
      },
    },
Now, what will this do? This will expose a Hasura CRUD API as part of the Gatsby GraphQL schema.
During development, Gatsby exposes a GraphQL IDE in the browser on the https://localhost:8000/___graphql endpoint, and since we’ve added a Hasura GraphQL endpoint within the gatsby-source-graphql configuration, now we will be able to see a blog field with all available queries.

As you can see we can now get a list of articles from our database.
Getting the data on the page
Gatsby has a mechanism of getting data onto the page during the build process by executing so-called page queries. In order to execute a page query we need to export a GraphQL query from the page component. You can read more in detail about that here.
When we export a GraphQL query from a page component (in our case it will be pages/index.js), the result of the query will be injected into the page component through props. So if we export the following query:
export const pageQuery = graphql`
  query {
    site {
      siteMetadata {
        title
      }
    }
    allArticles: blog {
      posts: articles(order_by: { date: desc, title: desc }, limit: 1000) {
        id
        title
        body
        date
        excerpt
      }
    }
  }
`
then we can get all articles data inside the page component. To get the articles data I can use data.allArticles.
const BlogIndex = ({ data, location }) => {
  const siteTitle = data.site.siteMetadata.title
  let posts = data.allArticles.posts
  return (
    <Layout location={location} title={siteTitle}>
      <SEO title="All posts" />
      <SimpleGrid columns={[1, 1, 2, 3]} spacing="40px">
      {posts.map(post => {
        const title = post.title
        return (
          <Article
            id={post.id}
            title={post.title}
            key={post.id}
            date={post.date}
            excerpt={post.description || post.excerpt}
            isNew={!existingIds.includes(post.id)}
          />
        )
      })}
      </SimpleGrid>
    </Layout>
  )
}
export default BlogIndex
It’s important to understand that page queries are running in build time and as soon as a website is built, page queries won’t run until the next build process. In the next section we will explore how to add dynamic functionality on the client in case we want more interactivity from our website.
Adding dynamic data using GraphQL subscriptions
What if we want to get more real-time functionality and subscribe to article changes using GraphQL subscriptions?
For that, we will need to do several things:
- Install and configure the apollo-client.
- Configure both the client and the server side rendering part of Gatsby to deal with subscriptions. You can read more about Gatsby and server side rendering here.
- Run GraphQL subscriptions on the client to fetch real-time data.
In order to fetch data dynamically, using GraphQL we will need a GraphQL client library. In our example we will use the apollo-client library, as it’s the most widely adopted library.
Let’s install it along with all required dependencies needed for the subscriptions configuration.
yarn add @apollo/react-hooks apollo-cache-inmemory apollo-client apollo-link apollo-link-http apollo-link-ws apollo-utilities subscription-transport-ws ws isomorphic-fetch
After installing all dependencies, we will create a new file called apolloClient.js (though you can call it with any name that you want) where we will configure our apollo client.
First of all, let’s create httpLink. HttpLink is our network interface for all http based requests to the GraphQL endpoint:
const http = new HttpLink({
  uri: "https://localhost:8080/v1/graphql",
  headers: {
"x-hasura-admin-secret": process.env.GATSBY_HASURA_GRAPHQL_ADMIN_SECRET,
  },
  fetch,
})
Notice that this example is different from the usual apollo client example. We pass the fetch implementation to HttpLink. This happens because this code can run both during server-side rendering (SSR) and in the browser, and we need to use isomorphic-fetch so our code will work in both environments.
We need to do the same for subscriptions. We need to pass the websockets implementation, but this time only when we are in the node environment (SSR):
const wsForNode = typeof window === "undefined" ? ws : null

const wsClient = new SubscriptionClient(
  "ws://localhost:8080/v1/graphql",
  {
    reconnect: true,
  },
  wsForNode
)

const websocket = new WebSocketLink(wsClient)
So now we have two network interfaces configured (http and websockets). For GraphQL subscriptions we will use websockets and for GraphQL queries and mutations we will use the http interface. I will do so using the proven technique using apollo-utilities:
const link = split(
  ({ query }) => {
    const { kind, operation } = getMainDefinition(query)
  return kind === "OperationDefinition" && operation === "subscription"
  },
  websocket,
  http
)
The final apollo client will look like this:
export const client = new ApolloClient({ link, cache: new InMemoryCache() })
Now if you’ve worked with Apollo previously you are probably familiar with the fact that you need to wrap the root element in ApolloProvider and pass a newly created client.
In Gatsby the process will be a bit different. Gatsby has gatsby-browser.js and gatsby-ssr.js files. Both files are in charge of what’s happening in the browser or during server-side rendering.
In order to wrap our root element within ApolloProvider, we will need to export a function called wrapRootElement from each one of these files. We want to keep our code DRY so we will actually export this function from:
apolloClient.js
export const wrapRootElement = ({ element }) => (
  <apolloprovider client="{client}">{element}</apolloprovider>
)
Now in both gatsby-browser.js and gatsby-ssr.js, we can do the following trick:
export { wrapRootElement } from "./src/apolloClient"
GraphQL subscriptions in action
Now let’s check how GraphQL subscriptions work in action. In our pages/index.js page we can run a GraphQL subscription:
import gql from "graphql-tag"
import { useSubscription } from "@apollo/react-hooks"

const SUBSCRIBE_TO_BLOG_POST_UPDATES = gql`
  subscription subscribeToBlogPostById($id: uuid) {
    articles {
      id
      title
      body
      date
      excerpt
    }
  }
`
To run this subscription, we use useSubscription hook like so:
const { data: subData } = useSubscription(SUBSCRIBE_TO_BLOG_POST_UPDATES, {
    suspend: false,
  })
During build time, Gatsby will call the Hasura engine, which will retrieve data from YugabyteDB and serve it to Gatsby during the build process. From that point on, a static page will be served to the client.
When a static page will be served, ApolloClient will connect to the Hasura engine via WebSockets and retrieve updated data from YugabyteDB using GraphQL subscriptions. Whenever a new article will be added or changed, the subscription will push real-time data from YugabyteDB to the client and our UI component will be rerendered.
Summary
As shown in this post, we can simultaneously have SEO-friendly static markup and real-time dynamic updates in our implementation of GraphQL and JAMstack. With Hasura we get GraphQL auto-generated for us and with YugabyteDB we get the resilience, scale, and geo-distribution of a distributed SQL database.
You can check out the code for the sample app here: https://github.com/vnovick/gatsby-realtime-blog


