Use Retool to Quickly Build Distributed SQL and React Apps
September 24, 2020
Retool is a next generation WSIWYG SaaS-based tool that enables you to quickly build React applications for internal consumption from your existing data sources using a variety of pre-built “building blocks.” Developers can choose from over 58 drag and drop components and combine them with custom JavaScript to create applications that can be securely deployed on-premise or hosted environments like Heroku. Retool supports over 30 native integrations including PostgreSQL, GraphQL, AWS S3, and Cassandra. Because YugabyteDB is PostgreSQL compatible, most third-party PostgreSQL tools and apps will work “out of the box.” Retool is no exception here.
In this blog post we’ll walk you though the following steps:
- Install a 3 node YugabyteDB cluster on Google Kubernetes Platform
- Build the Northwind sample database
- Configure Retool to connect to YugabyteDB via the PostgreSQL driver
- Build a simple React application on top of the Northwind database to help us manage inventor
Step 1: Install YugabyteDB on a GKE Cluster using Helm 3
In this section we are going to install YugabyteDB on the cluster. The complete steps are documented here. We’ll assume you already have a GKE cluster up and running as a starting point.
The first thing to do is to add the charts repository.
$ helm repo add yugabytedb https://charts.yugabyte.com
Now, fetch the updates.
$ helm repo update
Create a namespace. In this case we’ll call it yb-demo.
$ kubectl create namespace yb-demo
Expected output:
namespace/yb-demo created
We are now ready to install YugabyteDB. In the command below we’ll be specifying values for a resource constrained environment.
$ helm install yb-demo yugabytedb/yugabyte \
--set resource.master.requests.cpu=1,resource.master.requests.memory=1Gi,\
resource.tserver.requests.cpu=1,resource.tserver.requests.memory=1Gi,\
enableLoadBalancer=True --namespace yb-demo --wait
To check the status of the cluster, execute the below command:
$ kubectl get services --namespace yb-demo

Note the external-IP for yb-tserver-service which we are going to use to establish a connection between YugabyteDB and Retool. From the screenshot above we can see that the IP is 130.211.XX.XX and the YSQL port is 5433.
Step 2: Creating the Northwind sample database
The next step is to download a sample schema and data. You can find a variety of sample databases that are compatible with YugabyteDB in our Docs. For the purposes of this tutorial we are going to use the Northwind sample database. The Northwind database contains the sales data for a fictitious company called “Northwind Traders,” which imports and exports specialty foods from around the world. The Northwind database is an excellent tutorial schema for a small-business ERP, with customers, orders, inventory, purchasing, suppliers, shipping, employees, and single-entry accounting.
Connect to the yb-tserver-pod by running the following command:
$ kubectl exec -n yb-demo -it yb-tserver-0 /bin/bash
To download the schema and data files, run the following commands:
$ wget https://raw.githubusercontent.com/yugabyte/yugabyte-db/master/sample/northwind_ddl.sql
$ wget https://raw.githubusercontent.com/yugabyte/yugabyte-db/master/sample/northwind_data.sql
To connect to the YSQL service exit out of the pod shell and run the following command:
$ exit
$ kubectl exec -n yb-demo -it yb-tserver-0 -- ysqlsh -h yb-tserver-0.yb-tservers.yb-demo
Create a database and connect to it using the following commands:
yugabyte=# CREATE DATABASE northwind;
northwind=# \c northwind;
We can now create the database objects and load them with data using the files we downloaded to yb-tserver-pod using the following commands:
northwind=# \i 'northwind_ddl.sql';
northwind=# \i 'northwind_data.sql';
Verify that the tables are created by running the following command:
northwind-# \d

                 List of relations
 Schema |          Name          | Type  |  Owner
--------+------------------------+-------+----------
 public | categories             | table | yugabyte
 public | customer_customer_demo | table | yugabyte
 public | customer_demographics  | table | yugabyte
 public | customers              | table | yugabyte
 public | employee_territories   | table | yugabyte
 public | employees              | table | yugabyte
 public | order_details          | table | yugabyte
 public | orders                 | table | yugabyte
 public | products               | table | yugabyte
 public | region                 | table | yugabyte
 public | shippers               | table | yugabyte
 public | suppliers              | table | yugabyte
 public | territories            | table | yugabyte
 public | us_states              | table | yugabyte
(14 rows)
Verify we have data by issuing a simple SELECT:
northwind=# SELECT count(*) FROM products;
 count
-------
    77
(1 row)
By default, a YugabyteDB installation doesn’t have a password setup for the default yugabyte user. Specifying one is done the same way you’d do it in PostgreSQL.
northwind=# ALTER ROLE yugabyte WITH PASSWORD 'password';
Step 3: Configure Retool with YugabyteDB using the Native PostgreSQL Integration
First, head on over to https://retool.com/ and sign up for the service. Next we’ll work through the wizard to set up our first project, which will be a simple application to help us manage inventory in the Northwind database.
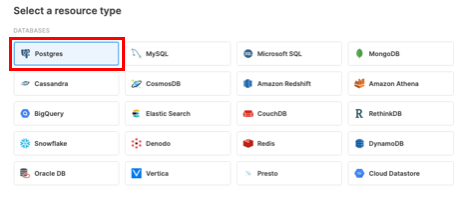
Select the PostgreSQL resource
Recall that YugabyteDB is PostgreSQL-compatible and as far as Retool is concerned, it “thinks” it is connecting to a PostgreSQL database.
Configure Connectivity
Note that we are using the external IP and port number of YugabyteDB detailed in Step 1.
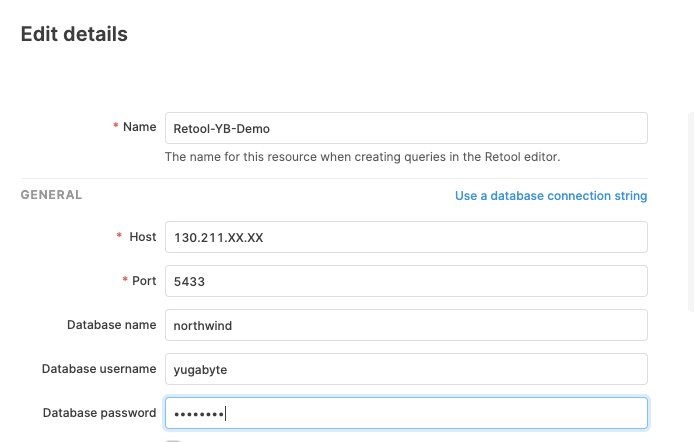
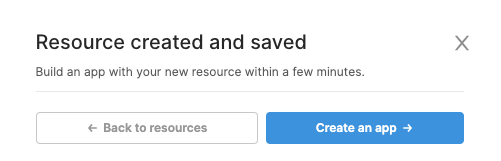
Test the connection. If successful, proceed to creating an app.
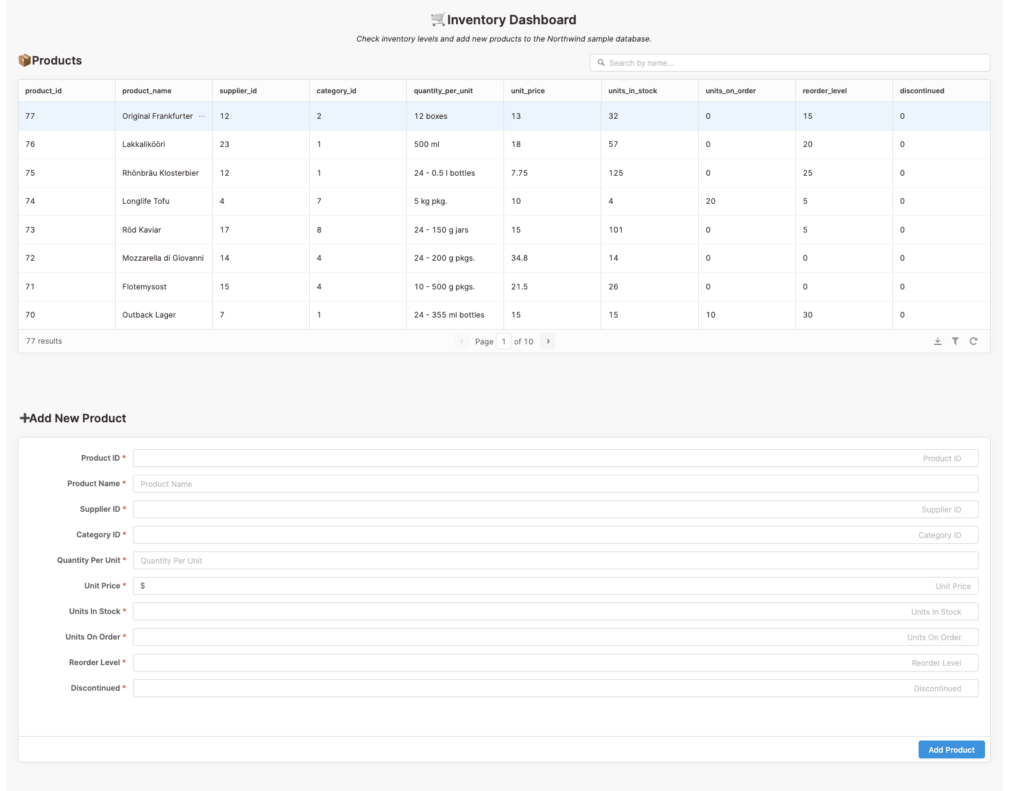
Step 4: Create the Inventory Dashboard with Retool
We are now ready to build a simple React application for our “buyer” to easily search and add new products to the Northwind database. Retool ships with a couple of templates that you can use to learn how the product works or to use a starting point for building your app. I went ahead and took their eCommerce Management sample app and tweaked it for my purposes.
Product Search
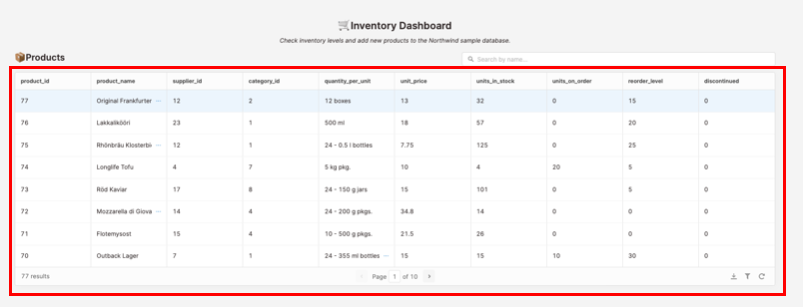
For this particular feature I wanted to make it easy for a “buyer” to search for products so they could check inventory levels.
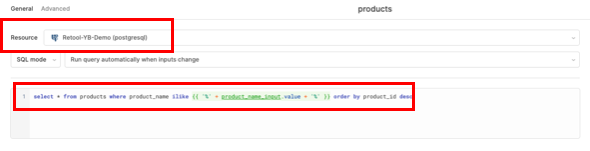
To build this feature I used the “Table” component which displays tabular data with pagination. I then assigned this component the required connectivity and the necessary SQL query to retrieve the data in the products table.
select * from products where product_name ilike {{ '%' + product_name_input.value + '%' }} order by product_id desc
Although there are a ton of additional options you can specify, I kept it simple for the purposes of this tutorial.
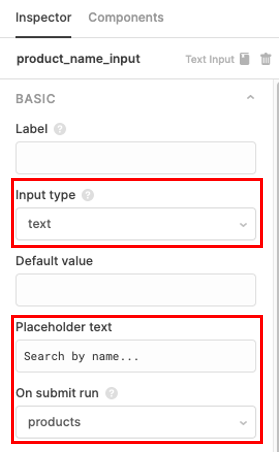
The next component I configured is the “Text Input” component which controls other components or queries with text. A few things to note here in the configuration of this component are that the input type must be “text”, the placeholder text is “Search by name…” and when you submit the text it should trigger the “products” component that we configured in the previous step.
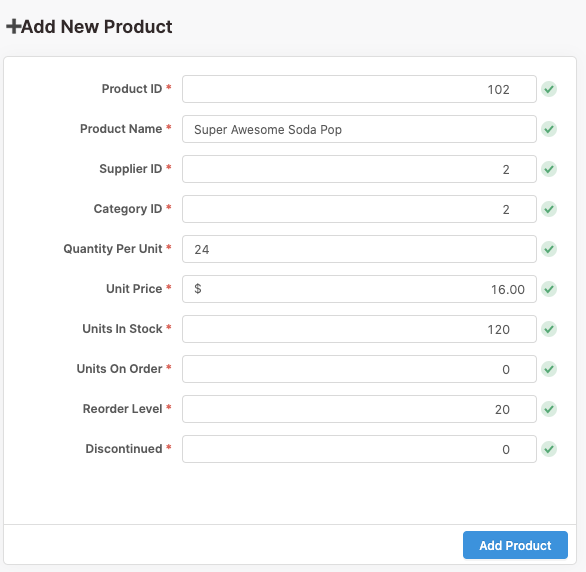
Add New Product
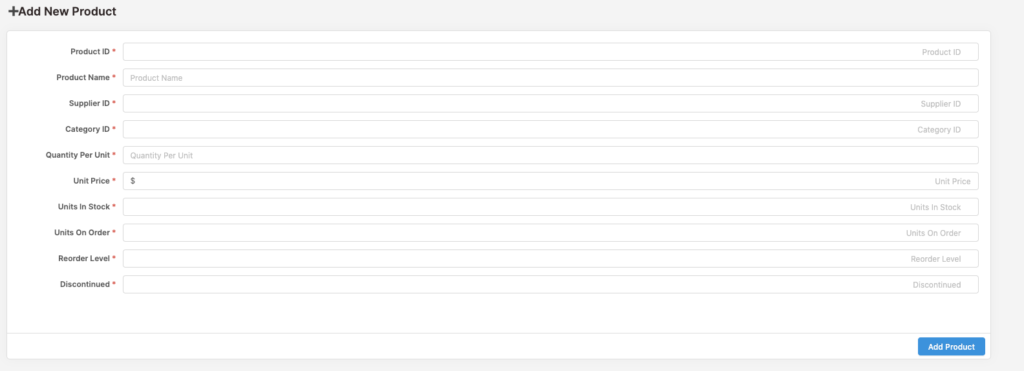
The next feature I wanted to build is one that made it easy to add new products to the Northwind database. To accomplish this I again made use of the “Text Input” component, specified the resource to connect to and the columns that would make up the changeset.
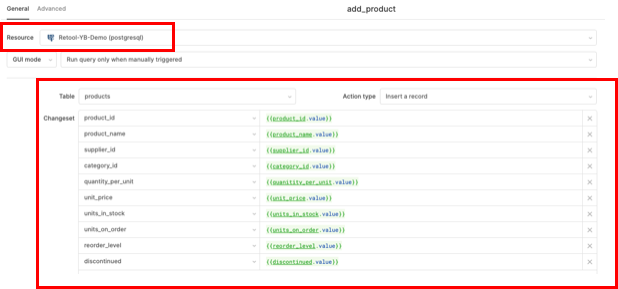
For example, here are the details concerning the product_name field.
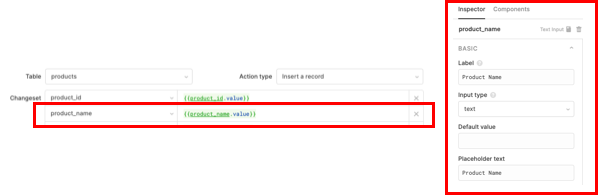
Finally, we’ll want to use the “Form” component to enable a “Add Product” button that will submit all of the text input fields via the “add_product” query we just configured.
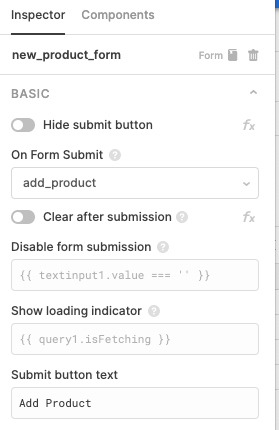
Again, there are a ton of additional options you can specify, but for the purposes of this tutorial I chose to keep it simple.
Step 5: Test the Inventory Dashboard
We are now ready to test our application. An easy way to do this is to click on the “Share” button on the upper right-hand corner of the Retool UI and share the app via the “Public Access Link.” I’d recommend enabling password protection. We should now be able to interact with our application in our favorite browser.
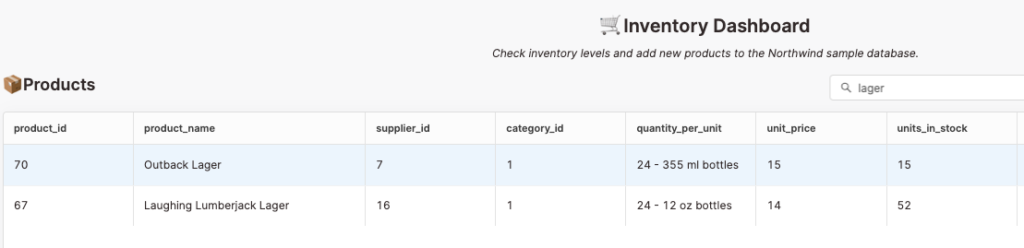
Let’s find the inventory levels for products which have “lager” in their names. We input the text and click enter. We get two results back from the Northwind database. Looks like the product search feature is working as intended.
Next let’s add a new product to the Northwind database.
After clicking on the “Add Product” button, let’s verify that our new product is now in inventory by searching for products with “soda” in their name.

Looks like “Super Awesome Soda Pop” is now in our inventory.
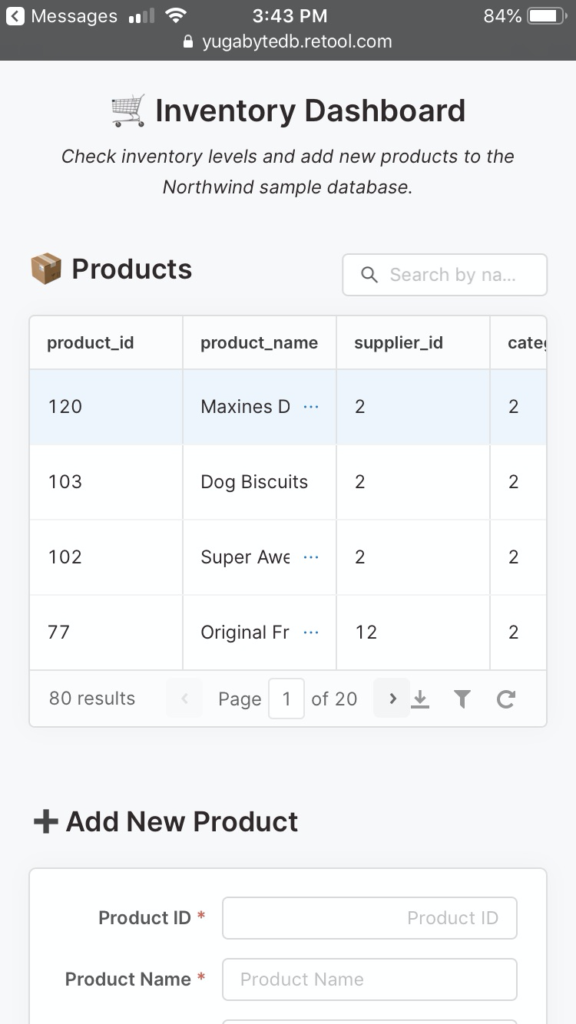
Bonus: We can now also access our inventory app from a mobile device using the same URL. Although not perfect, it is “mobile friendly” enough for our purposes.
Conclusion
That’s it! You now have a 3 node YugabyteDB cluster on GKE, with the sample Northwind database and simple inventory application that was built in just a few minutes using Retool.


