Testing Spring Boot Applications with YugabyteDB Using Testcontainers
January 10, 2023
Testing is an integral part of software development and is a way to ensure that the software is working as expected. At Yugabyte, we follow established practices like TDD (Test Driven Development) and BDD (Behavior Driven Development) to ensure that the code is tested and working as expected.
TDD is a software development process that relies on repeating a concise development cycle. First, we translate the requirements into specific test case(s), then the software is improved with just enough code to make the test case(s) pass. This cycle is repeated until all requirements are fully met.
As part of this integration testing, individual units are combined and tested as a group. Frameworks like Spring Boot provide a way to write integration tests with an embedded database.
However, in a production environment, the database is not embedded. It is a separate service accessed by the application. Though testing with an embedded database is useful, it’s not a true representation of the production environment.
Testing with a real database requires at least two services running in the local workstation—one for development and the other as a (disposable) test database. This can be cumbersome, and it requires a lot of setup from a developer’s perspective. This is where a runtime dependency such as Testcontainers comes in handy.
Testcontainers is a Java library that supports JUnit tests, providing lightweight, throwaway instances of common services that can run in a Docker container. Though initially targeted at the JVM ecosystem, it can be leveraged for other programming languages. Testcontainers is a great way to write integration tests for frameworks like Spring Boot, with a real database.
We recently added support for the YugabyteDB module in Testcontainers. Read this blog to learn how to use Testcontainers to write integration tests for a Spring Boot application with the Yugabyte database.
Prerequisites:
- JDK 17 or above to test the sample application code. You can use SDKMAN to install the JDK runtime.
- Docker Engine – follow this link to set it up based on your workstation.
The source code repo has a Gitpod launcher file to test everything via a browser interface in the cloud to avoid setting up the prerequisites in a local workstation.
Getting started:
The code snippet used in this blog is available in this Github repository. It consists of a simple JPA-based web application with CRUD functionality. In this blog, we’ll only focus on the database integration testing snippets. From an integration standpoint, we need to do the following two steps:
- Define the library dependency in the build file.
- Initialize the container programmatically or via the configuration file.
Define the library dependency:
Define the library details in the build file. The referred sample JPA app uses Gradle as the build tool. Refer to the build.gradle in the repository for complete info.
// version details for the BOM
extra["testcontainersVersion"] = "1.17.6"

// library
dependencies {
    testImplementation("org.testcontainers:yugabytedb")
    testImplementation("org.testcontainers:junit-jupiter")
}
dependencyManagement {
imports {
mavenBom("org.testcontainers:testcontainers-bom:${property("testcontainersVersion")}")
}
}Initialize the YugabyteDB Testcontainer:
The YugabyteDB Testcontainers module supports both YSQL and YCQL APIs. However, in this blog, we will focus only on YSQL integration.
Option 1:
Initialize the YugabyteDB Testcontainer using the @Container annotation.
@Container
YugabyteDBYSQLContainer container = new YugabyteDBYSQLContainer("yugabytedb/yugabyte:2.16.0.0-b90").withDatabaseName("yugabyte").withUsername("yugabyte").withPassword("yugabyte").withReuse(true);
Refer to this class file for the complete definition.
The following snippet is required to populate the data source info:
@DynamicPropertySource
static void datasourceProps(final DynamicPropertyRegistry registry) {
  registry.add("spring.datasource.url", container::getJdbcUrl);
  registry.add("spring.datasource.username", container::getUsername);
  registry.add("spring.datasource.password", container::getPassword);
  registry.add("spring.datasource.driver-class-name", () -> "com.yugabyte.Driver");
}
Option 2:
An alternative is to define the “tc” JDBC URL in the application-test properties file.
spring:
  datasource:
    url: jdbc:tc:yugabyte:2.14.4.0-b26:///yugabyte
    username: yugabyte
    password: yugabyte
These are the two steps to integrate Testcontainers in a Spring Boot app. The rest of the sections are framework-specific and follow the standard way of writing integration test cases.
Write the Integration Test Classes
This section follows the standard Spring Boot integration test framework. We use the following annotations.
@SpringBootTest(webEnvironment = SpringBootTest.WebEnvironment.NONE)
- This annotation loads the application context. The webEnvironment attribute is set to NONE because we do not want to start the embedded servlet container for our test. This property is handy if we want to test the service or repository layer.
@AutoConfigureTestDatabase(replace = NONE)
- This annotation replaces any data source with the embedded H2 instance by default. So, we need to override this behavior by adding replace=Replace.NONE so that the application uses the real database through Testcontainers.
@Testcontainers
- This annotation enables Testcontainers for the test class.
@ActiveProfiles(“test”)
- This activates the test application profile (application-test.[yaml|properties]). This profile configures the application to use the real database through Testcontainers.
@DataJpaTest
- This annotation is for a JPA test focusing only on the repository components.
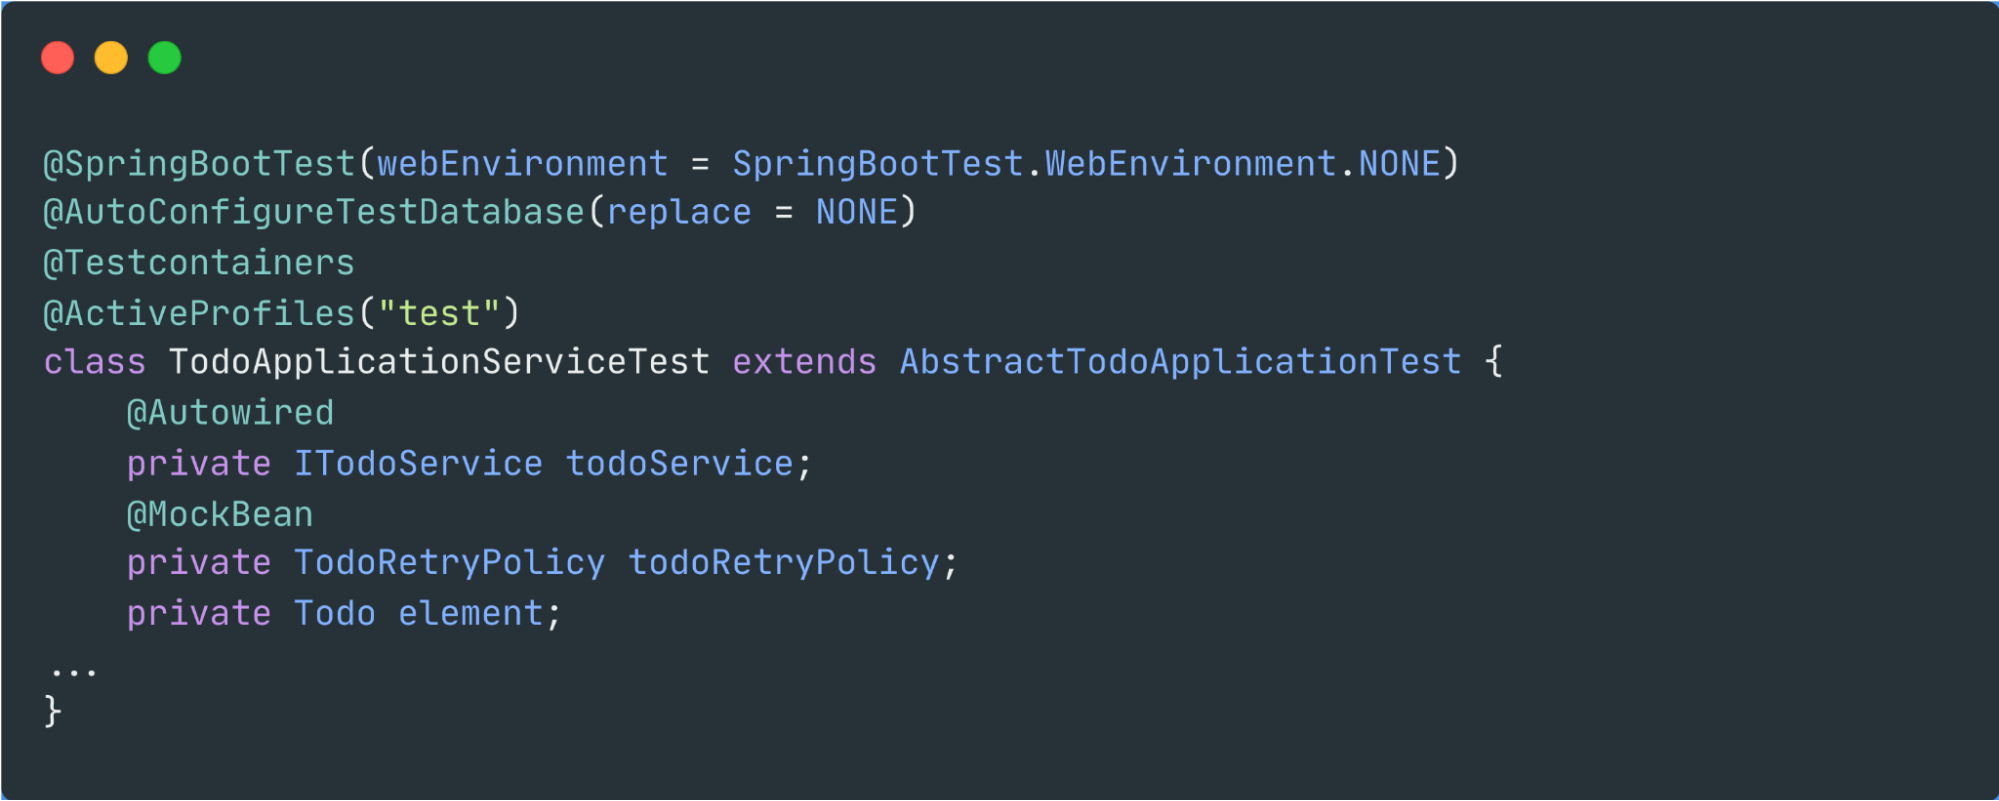
Testing the Service Layer:
Refer to this Github class file for the complete source.
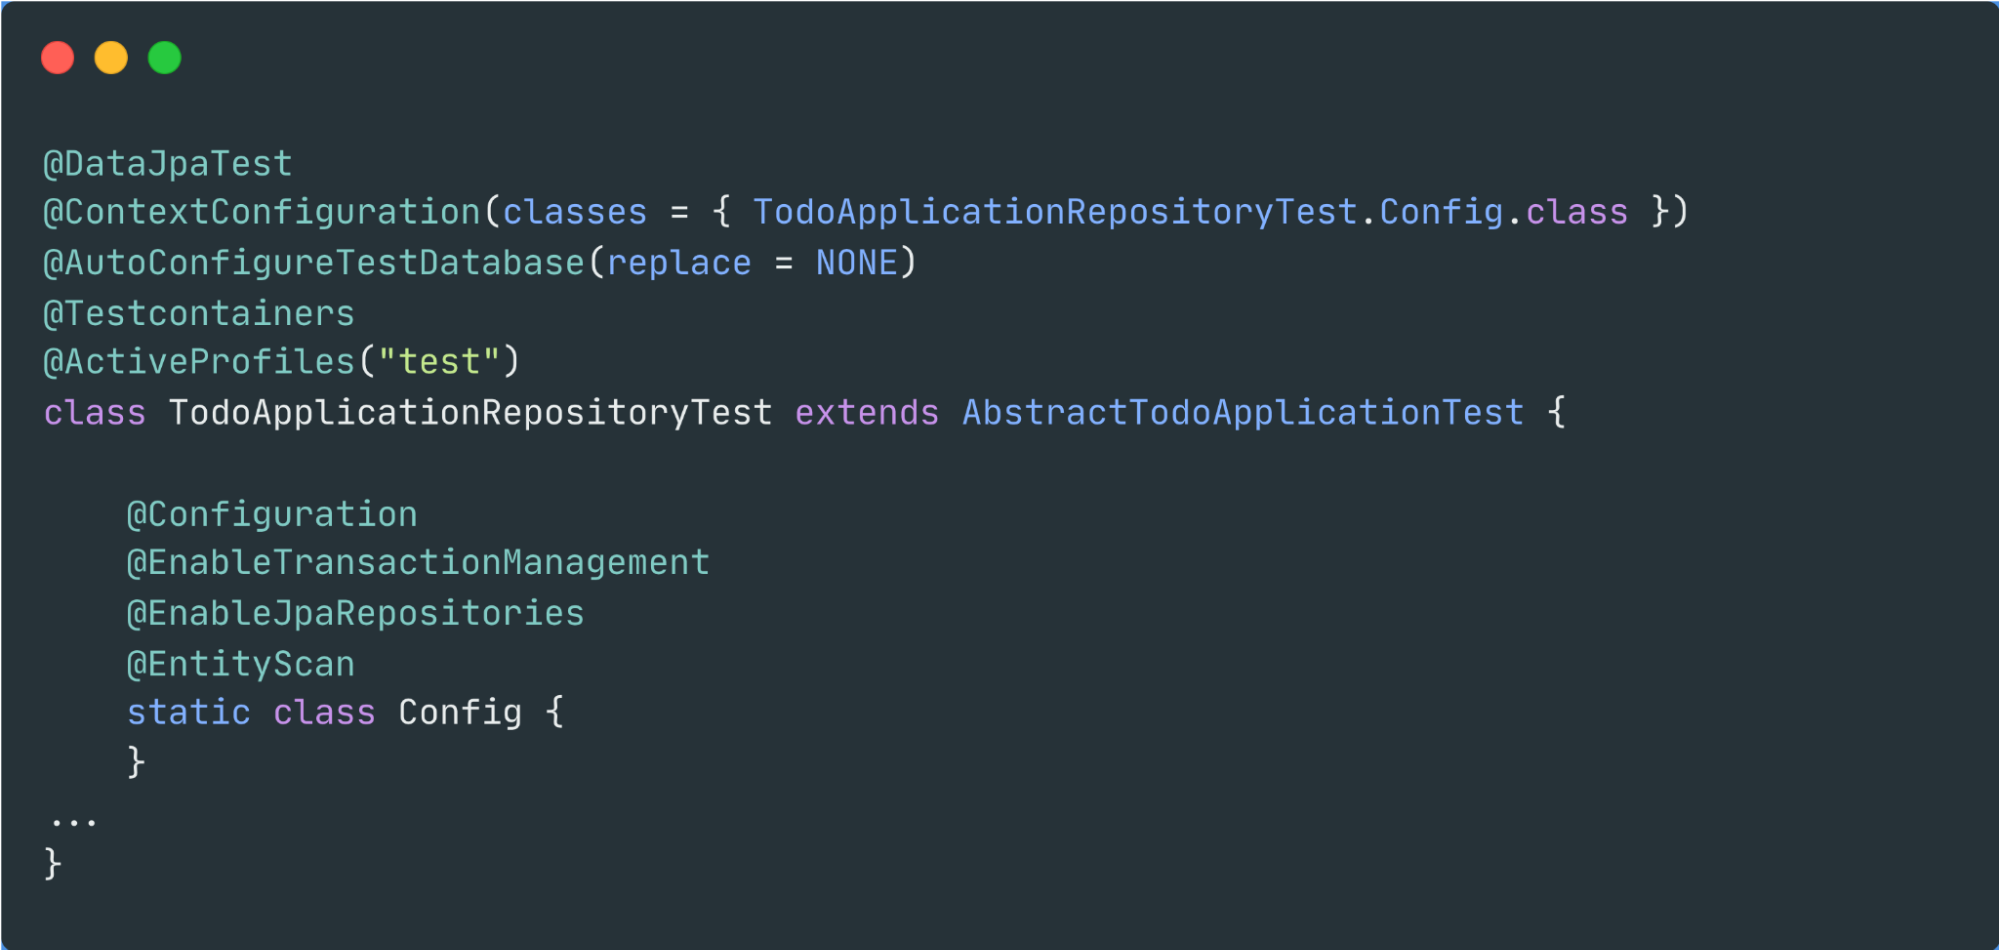
Testing the Repository Layer:
Refer to this Github class file for the complete source.
Try it Yourself
The source repository includes the gitpod configuration information in .gitpod-tc.yml. Replace the .gitpod.yml file with that information and hit https://gitpod.io/#<source_repo> in the browser to try this example.
Conclusion
This blog focused on how to write integration tests for a Spring Boot application with YugabyteDB using Testcontainers. Please take a look at the YugabyteDB for Testcontainers documentation for additional information.
If you have questions or feedback, please join our active Community Slack and chat with the growing distributed SQL community.


