Auto-Balancing Data in YugabyteDB, a Distributed SQL Database
June 29, 2021
YugabyteDB is a distributed, fault tolerant and highly available database with extremely low latencies for reads and writes. Data in YugabyteDB is sharded, replicated and balanced across multiple nodes that can potentially be in different availability zones, regions or even clouds for that matter. In this blog post, we look at how data balancing happens in YugabyteDB and some of the key features of YugabyteDB’s “Cluster Balancer.”
The cluster balancer runs once every second. During its lifetime, as nodes are added, fail or decommissioned, it continues to balance the load and enforce data placement constraints automatically. In YugabyteDB shards of a table are called tablets and multiple redundant copies of these tablets are called replicas. Currently, the total number of tablets and its replicas is taken to be a measure of the load on a node. However there’s active work in progress to take into account their actual workload as well. The cluster balancer’s rate of balancing and concurrency can be controlled via knobs. Let’s look at some of its key features:
Per table balancing
YugabyteDB’s cluster balancer balances the shards of a table and replicas of a shard so that they get uniformly distributed across nodes. This ensures that the IOPS (reads/writes) of a table don’t get concentrated on any subset of nodes and thus the workload is evenly distributed amongst the nodes resulting in increased throughput and lower latencies.
To begin with, let’s assume that the replication factor is 1 (i.e. we keep a single copy of each shard). Let’s say that we have a single node with 3 tables and each table having 3 shards (we call these shards ‘tablets’ in YugabyteDB).
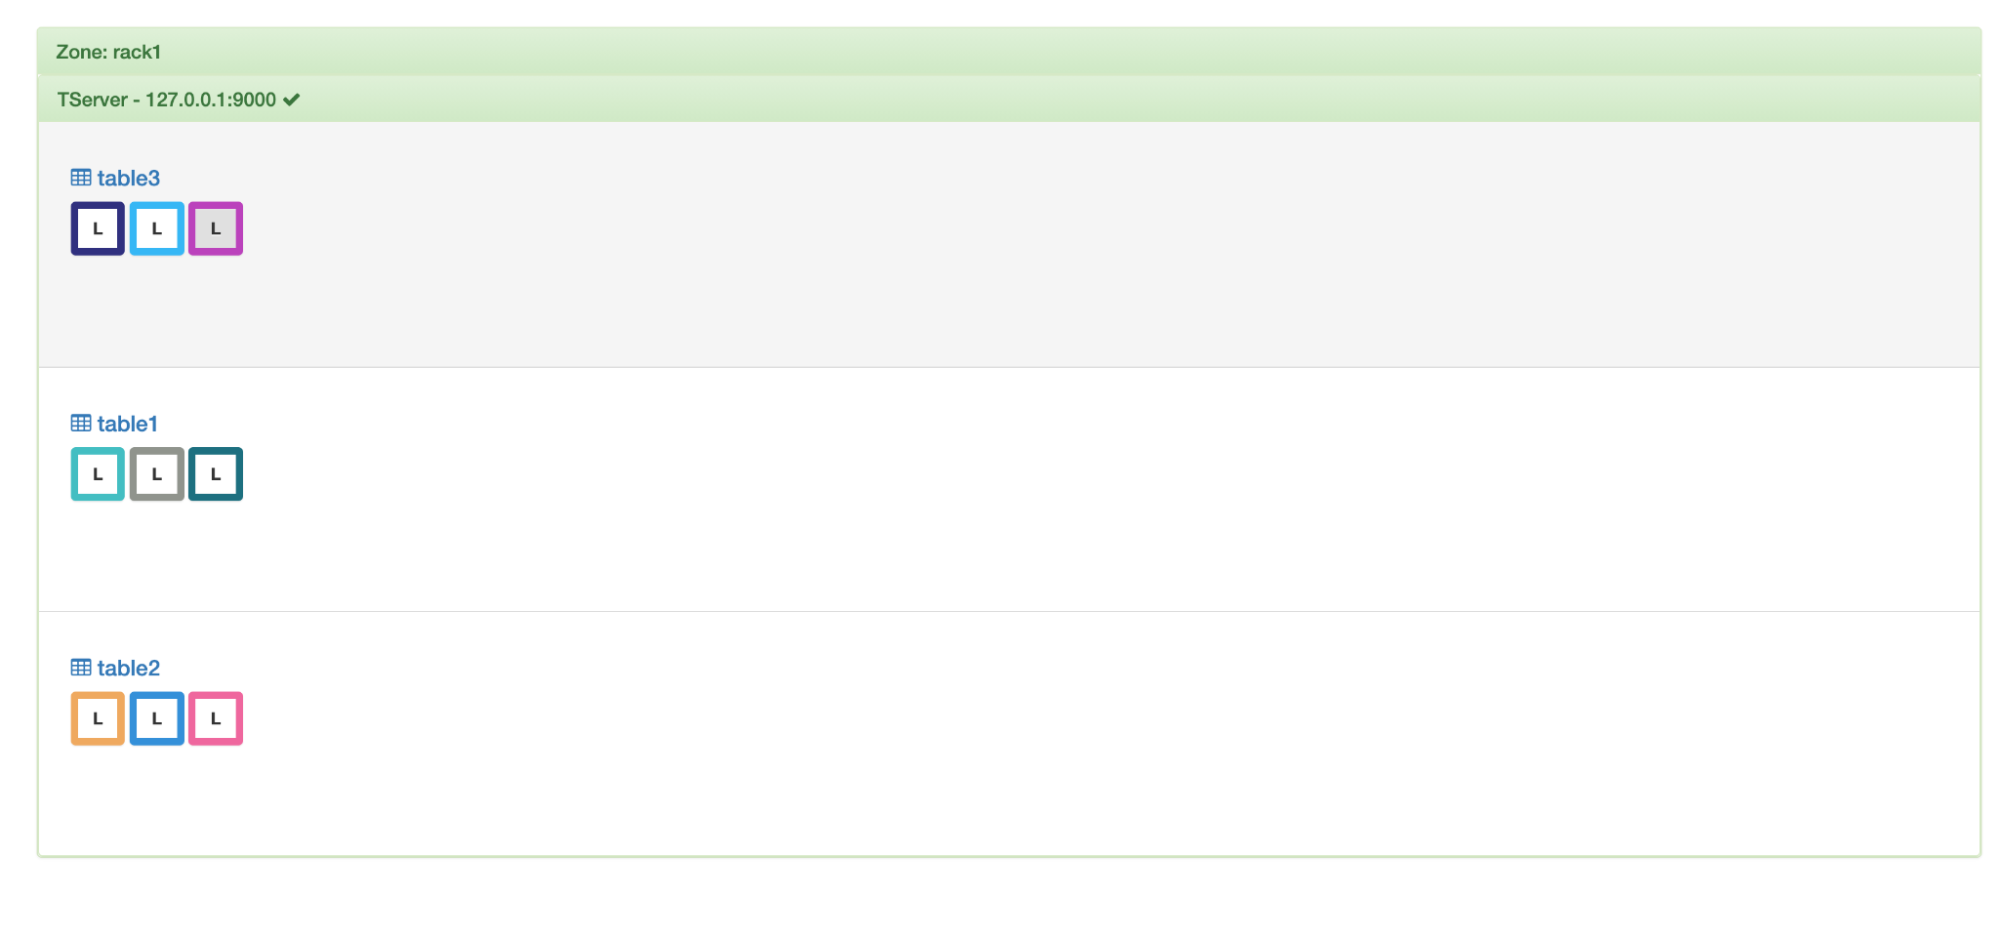
Initial setup
If we add a node to this cluster, then we’ll be able to see one tablet per table getting moved off to this new node making the load distribution per table from (3, 0) to (2, 1). This is per table balancing in action.
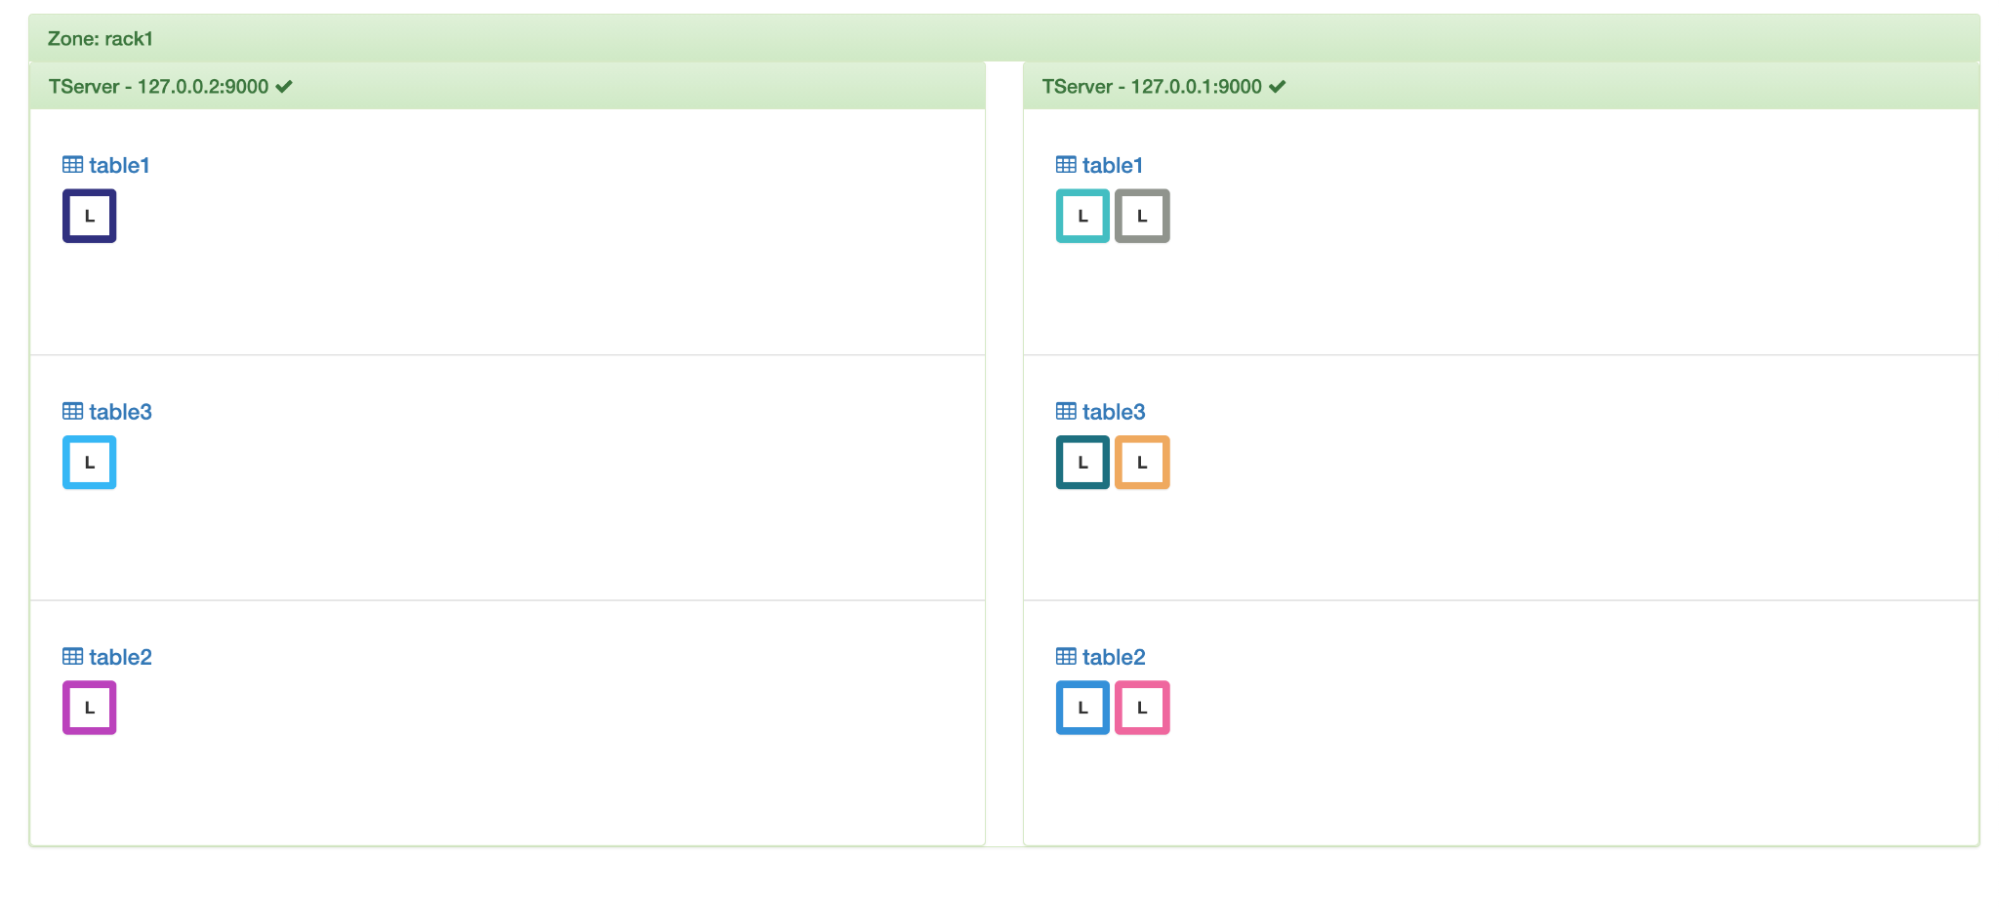
Per table balancing
Global Balancing
If we look at the load distribution above, we can see that although the loads are balanced per table at (2, 1) each, overall if we include all the 3 tables, the load distribution is skewed at (6, 3). This is where global balancing comes in and balances the load to (5, 4) by shifting another tablet from one of the tables to the newly added node. In this simulation, a tablet of table2 gets transferred.
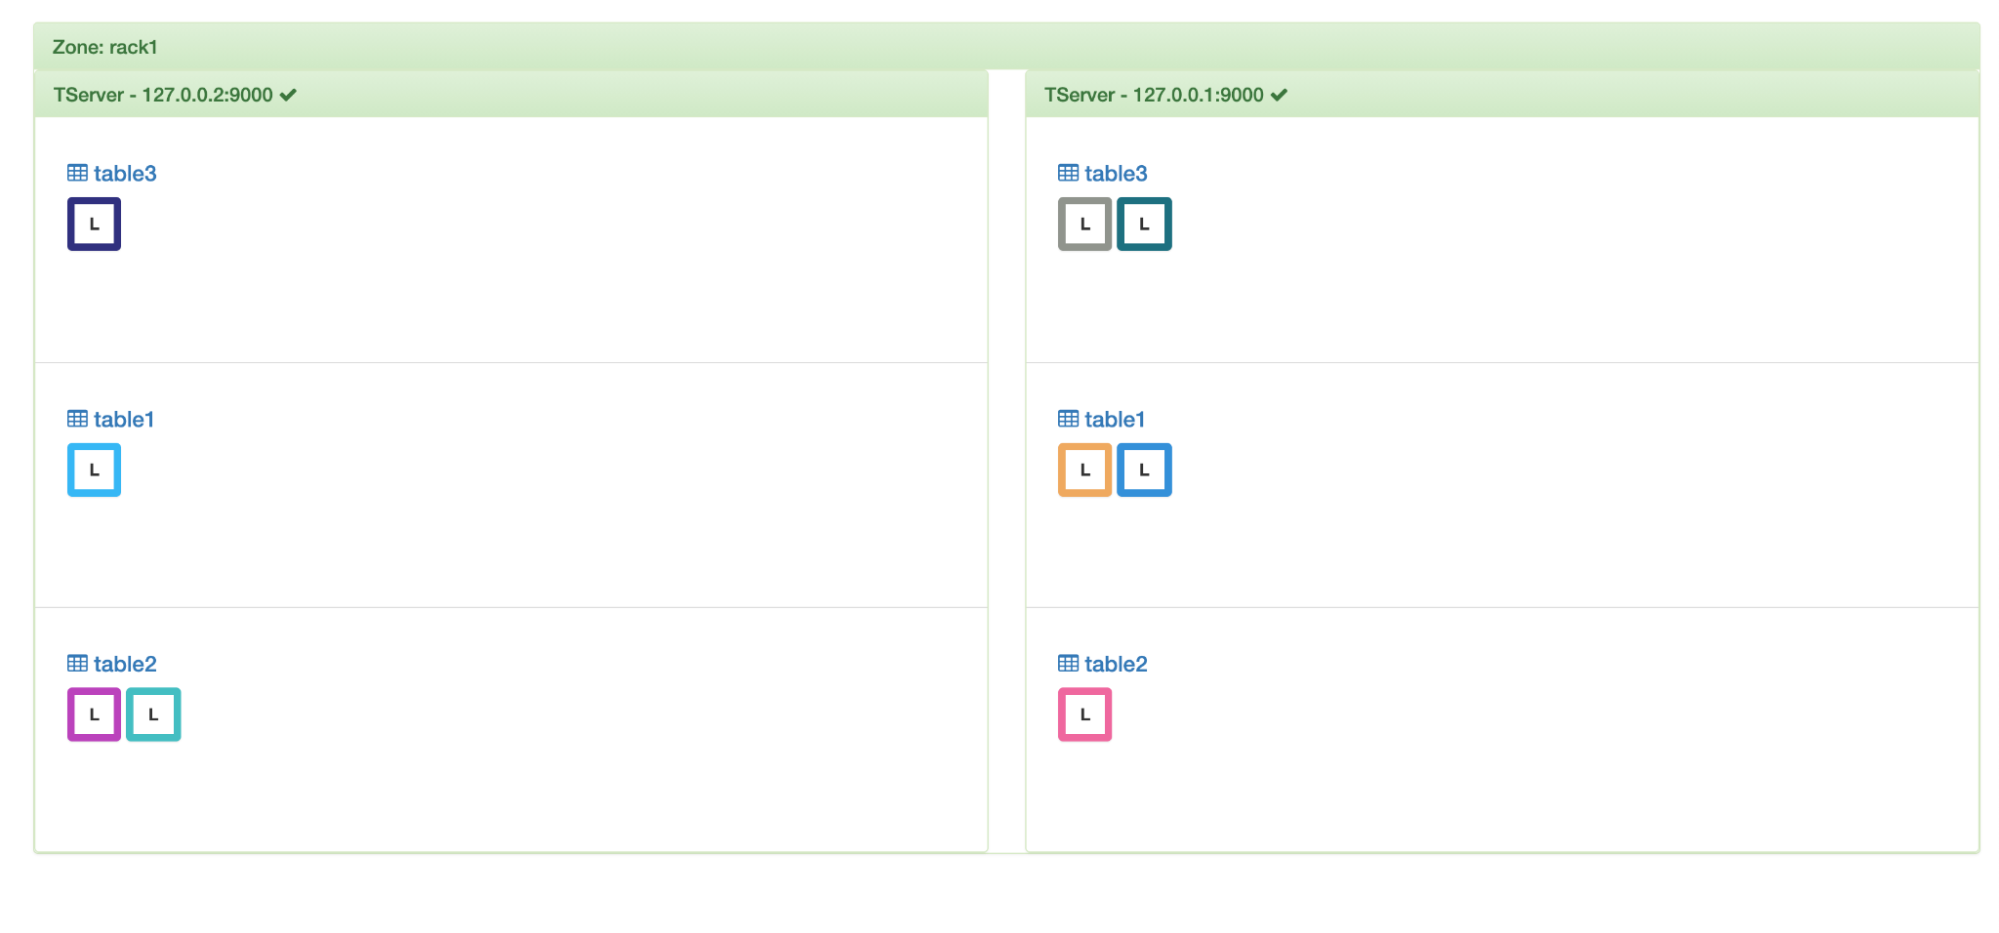
Global balancing
Let’s add another node and evenly distribute the load amongst them.
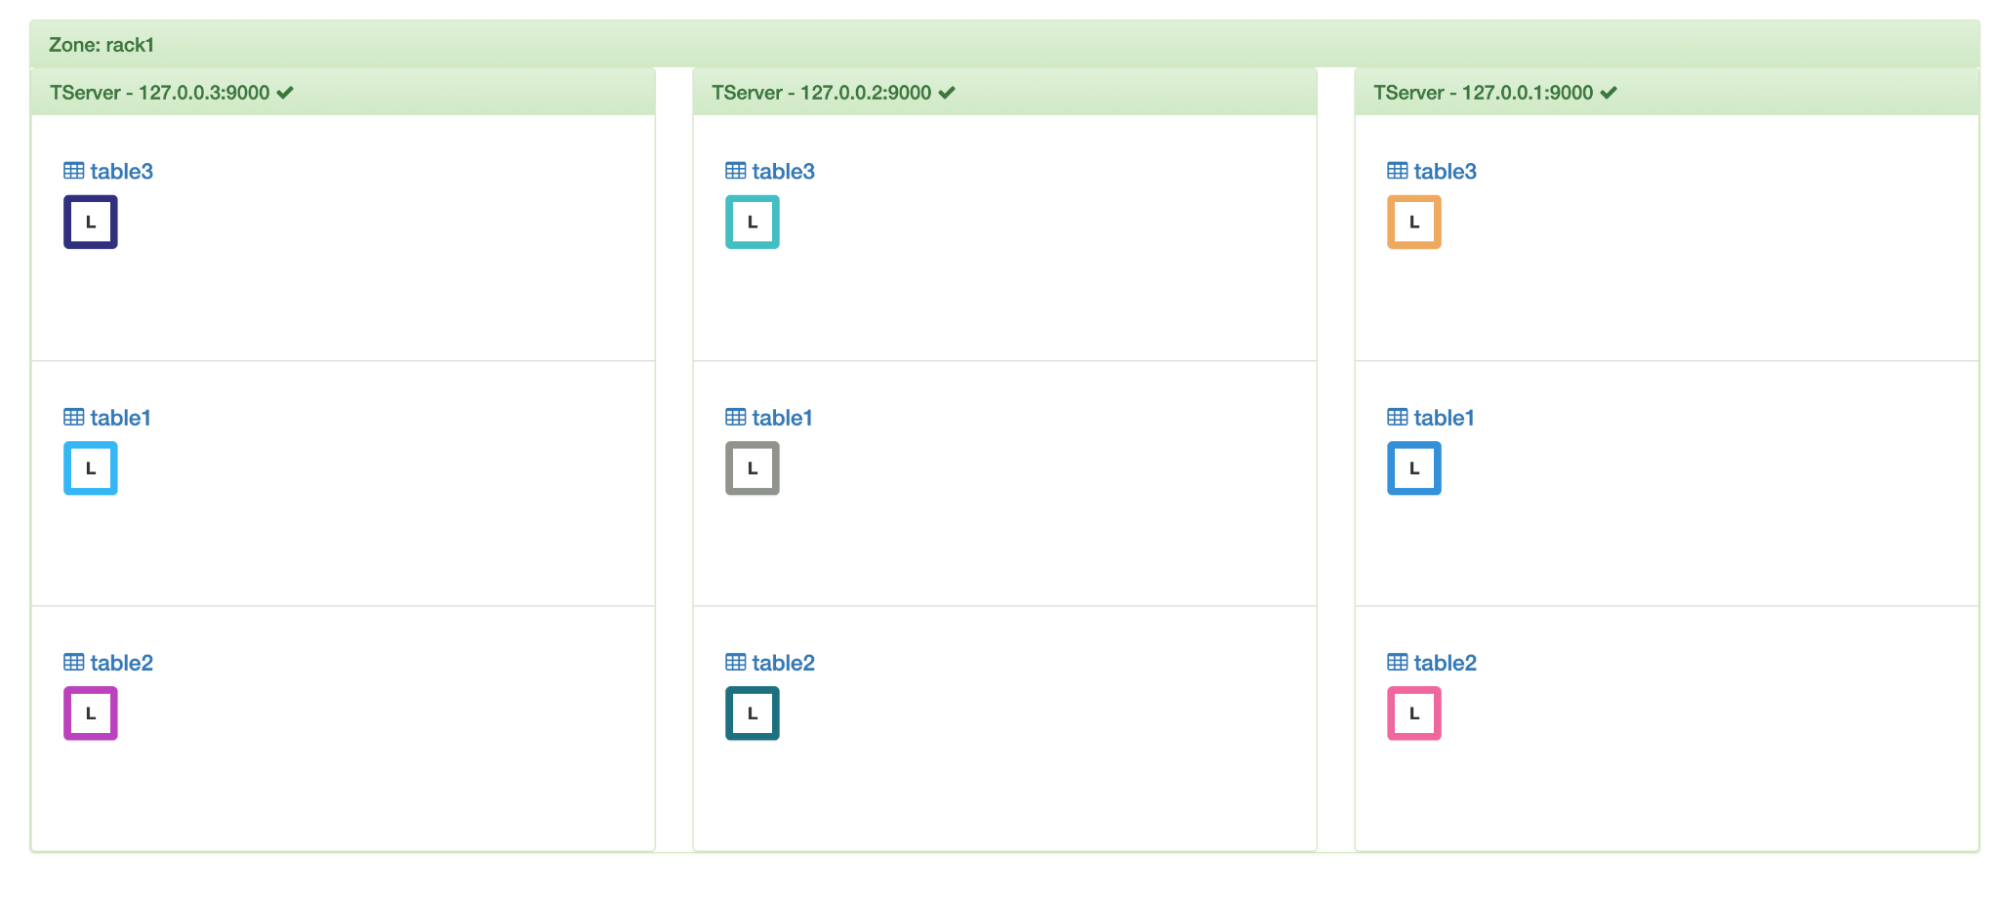
3 nodes
Handles replication
In the entire illustration till now, there’s only one copy of a shard (tablet). With YugabyteDB, the more common deployment is to have multiple copies of a shard (called replicas) for fault tolerance so that if a node goes down then other replicas can serve reads/writes. In such scenarios, we designate one of the copies as the leader that facilitates all the writes and the standby copies as followers.
In the above example, if we increase the replication factor to 3 then we can see copies of the tablets getting created and distributed uniformly across the nodes. We had 3 tablets per table. For every tablet, we will have 3 replicas – thus a table will have a total of 3*3 = 9 replicas. Dotted boxes around replicas denote followers and solid ones are the leaders.
Replication factor of 3
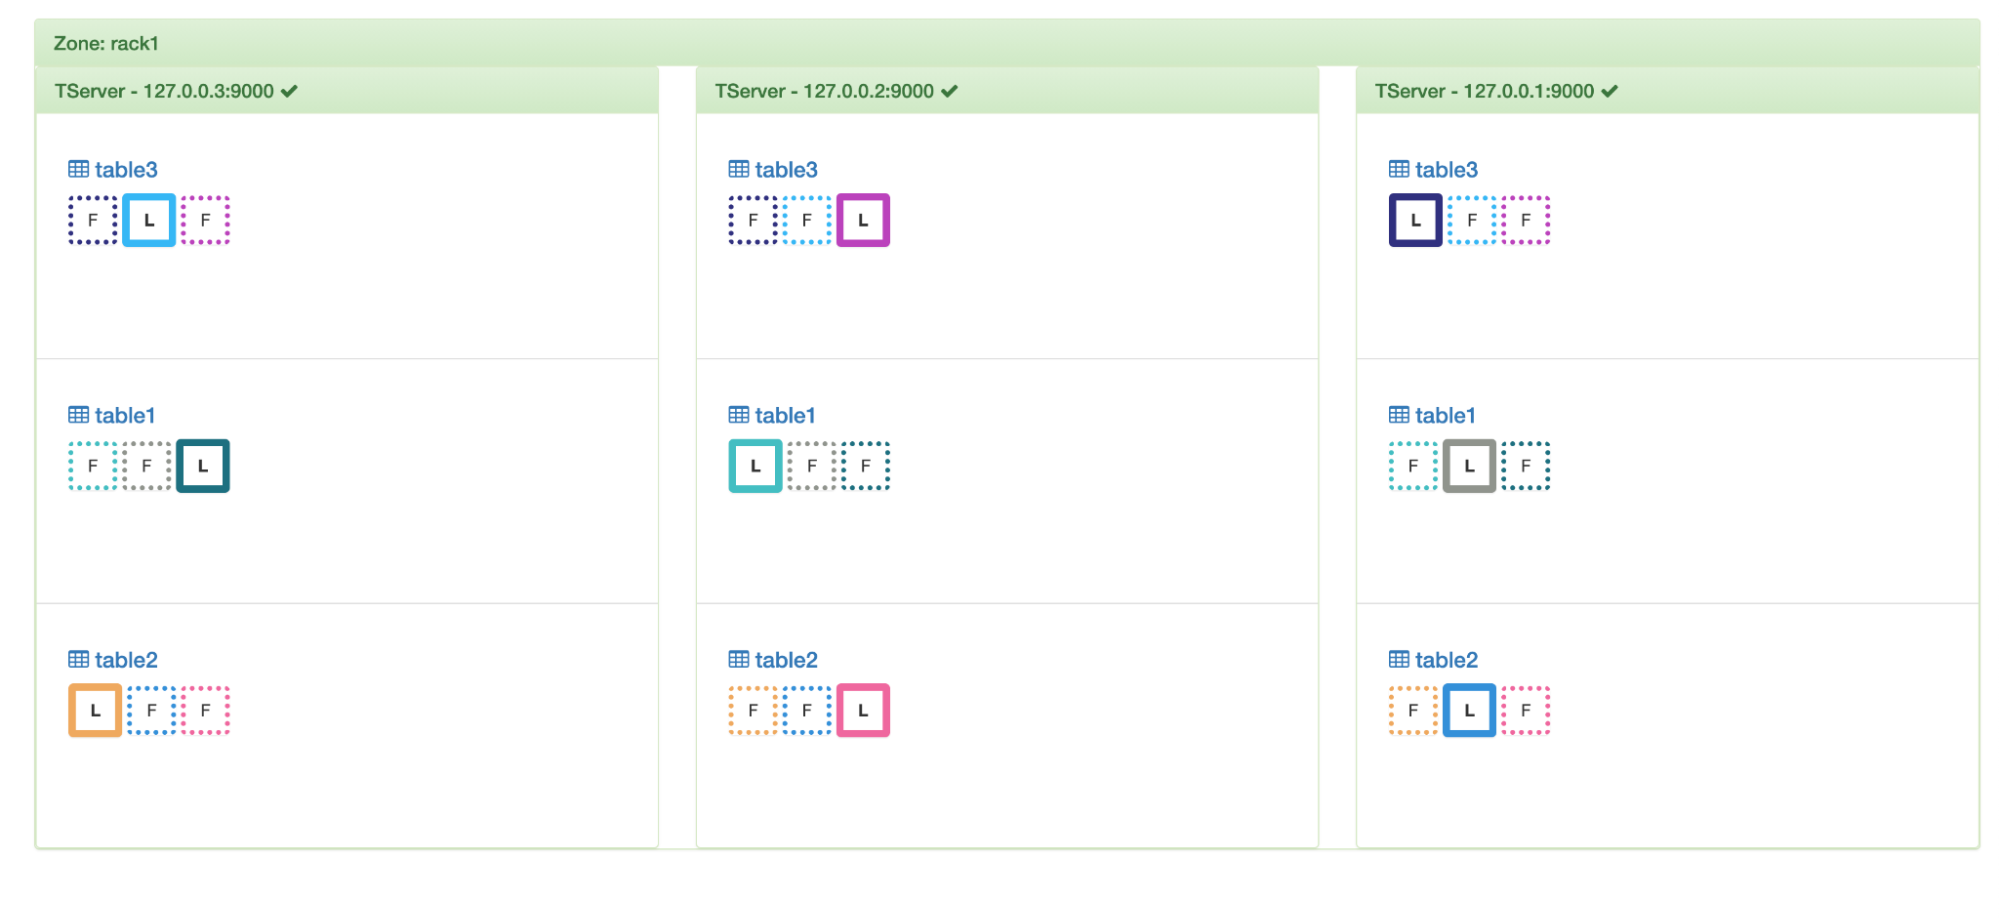
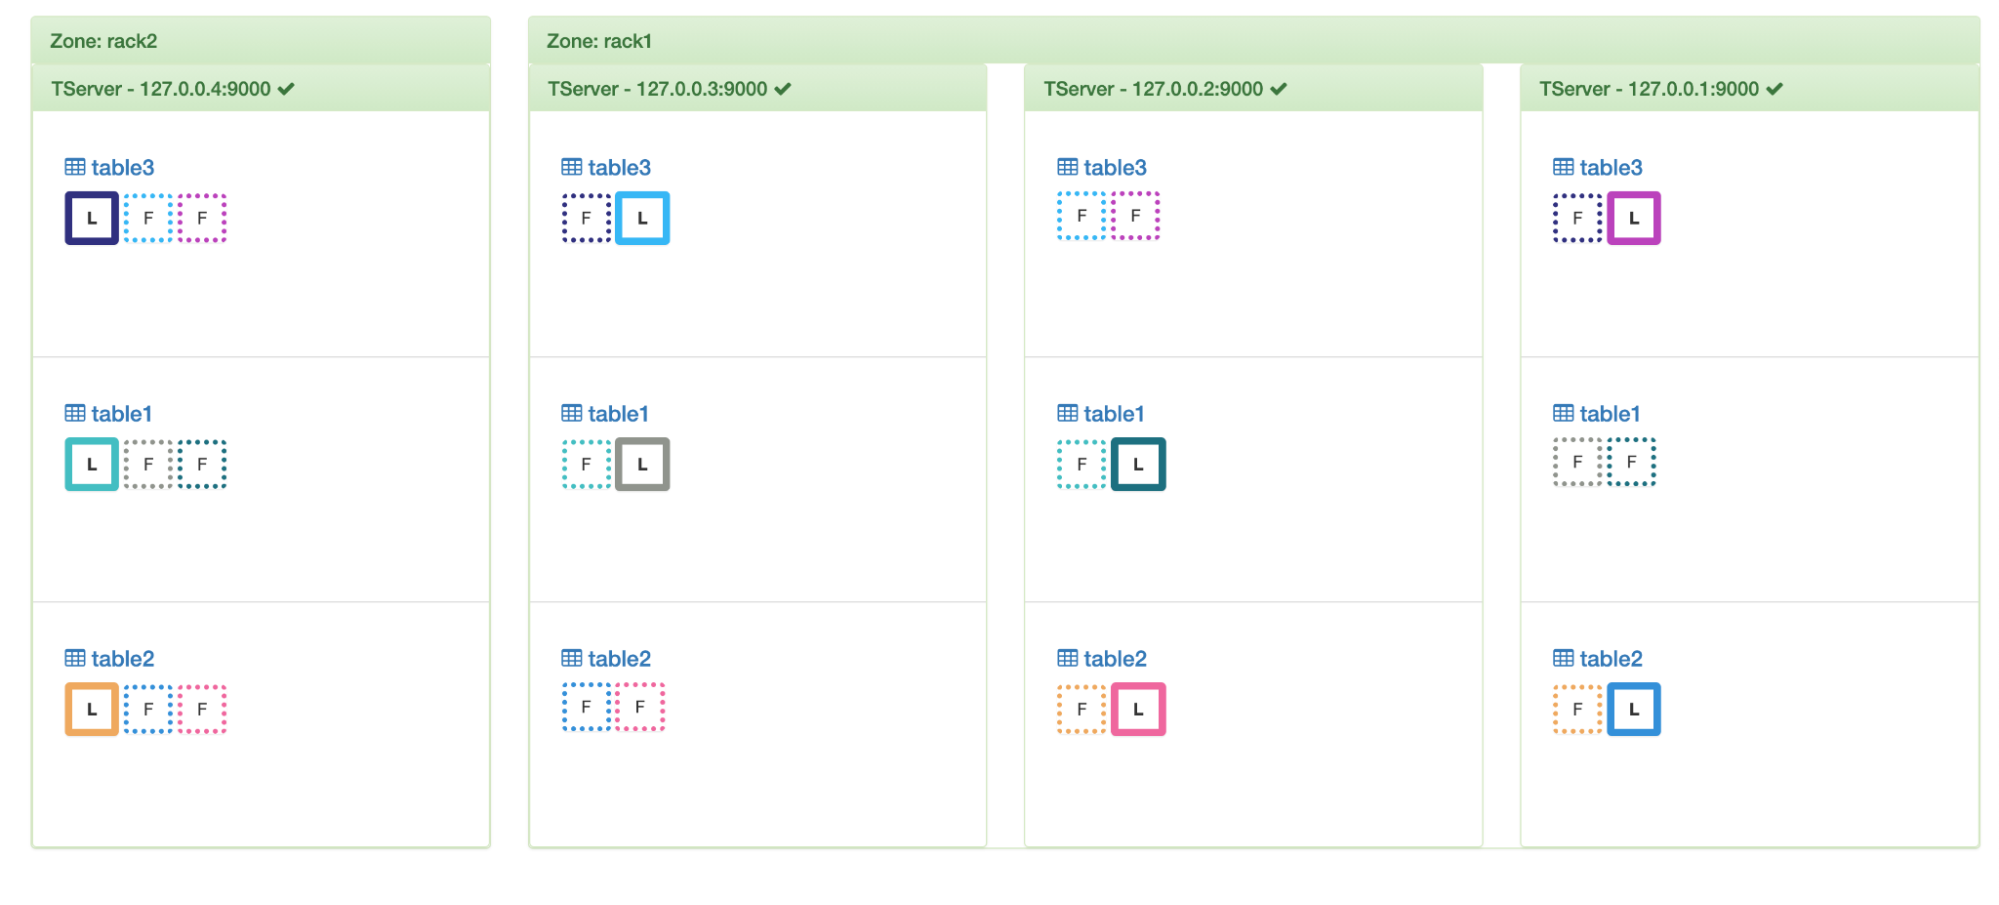
User-Defined Data Placement Policies
With YugabyteDB, we can have a custom placement policy for the replicas. For instance, in the above configuration, we have all of the 3 nodes placed in cloud – cloud1, region – datacenter1 and zone – rack1. If we specify a policy that we want all of the 3 replicas in cloud1.datacenter1.rack1 and add a node in rack2 then the load balancer respects this placement by not transferring any load to this new node.
No load transferred because of placement policy
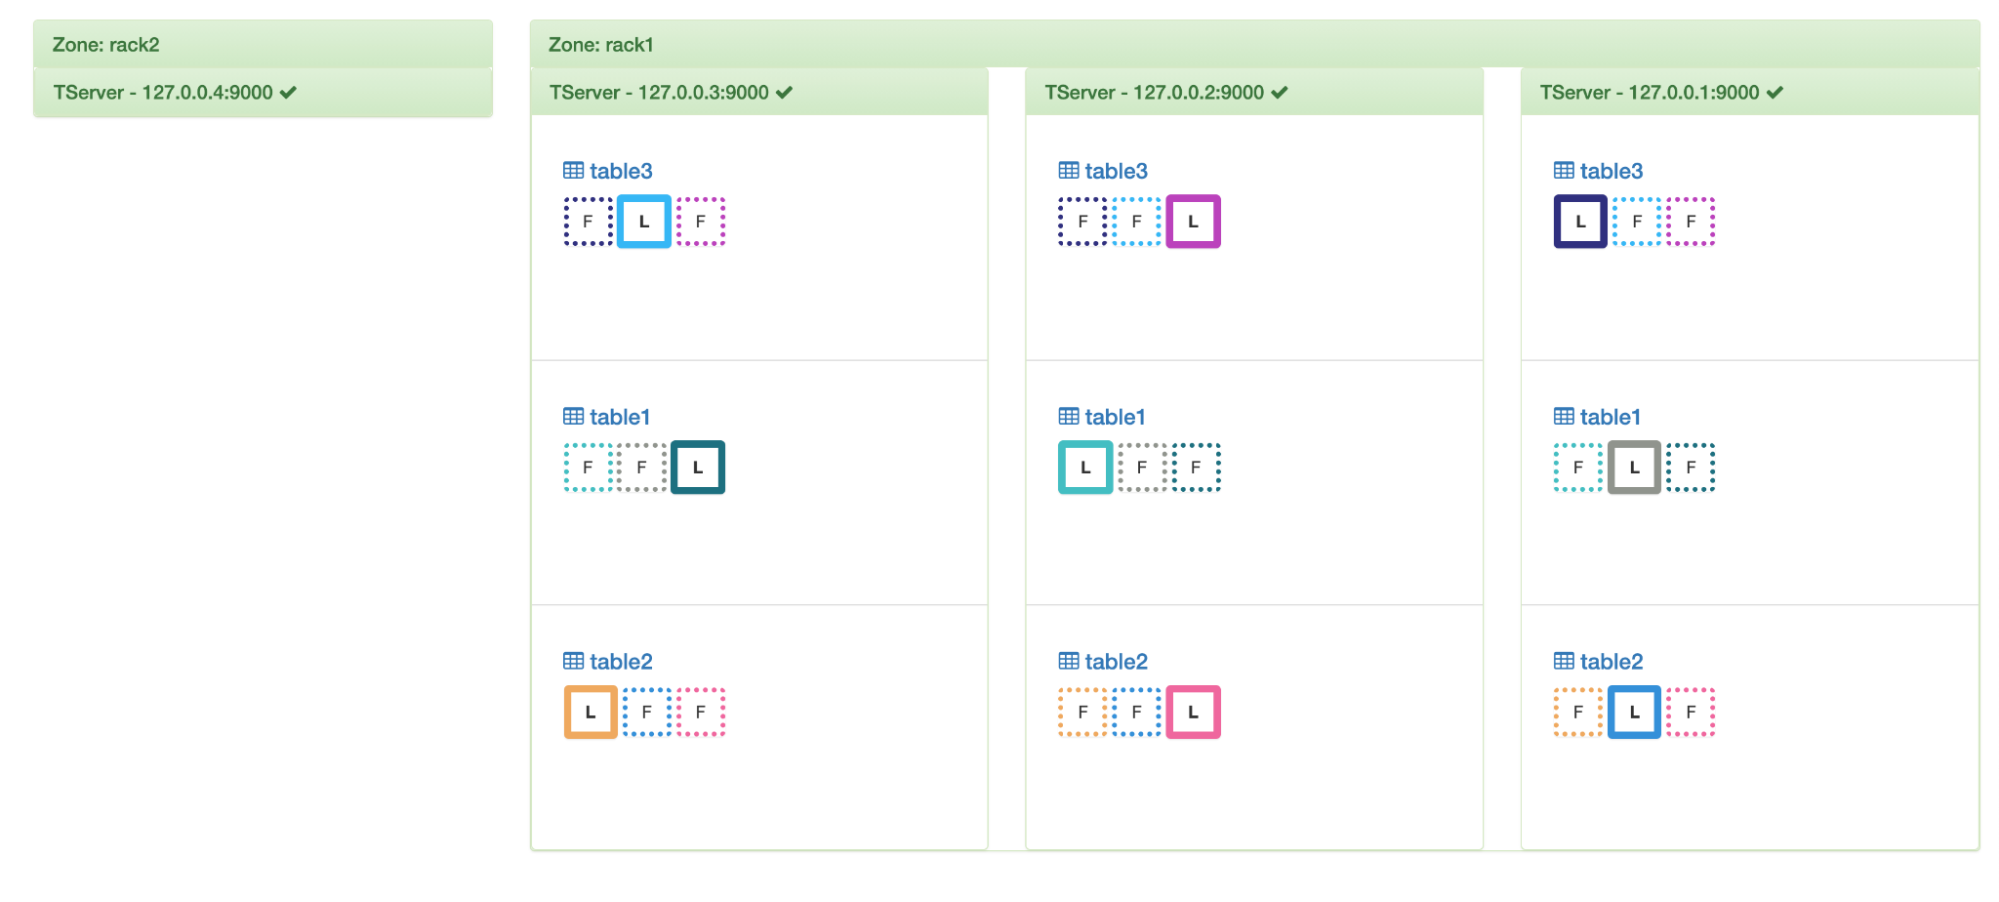
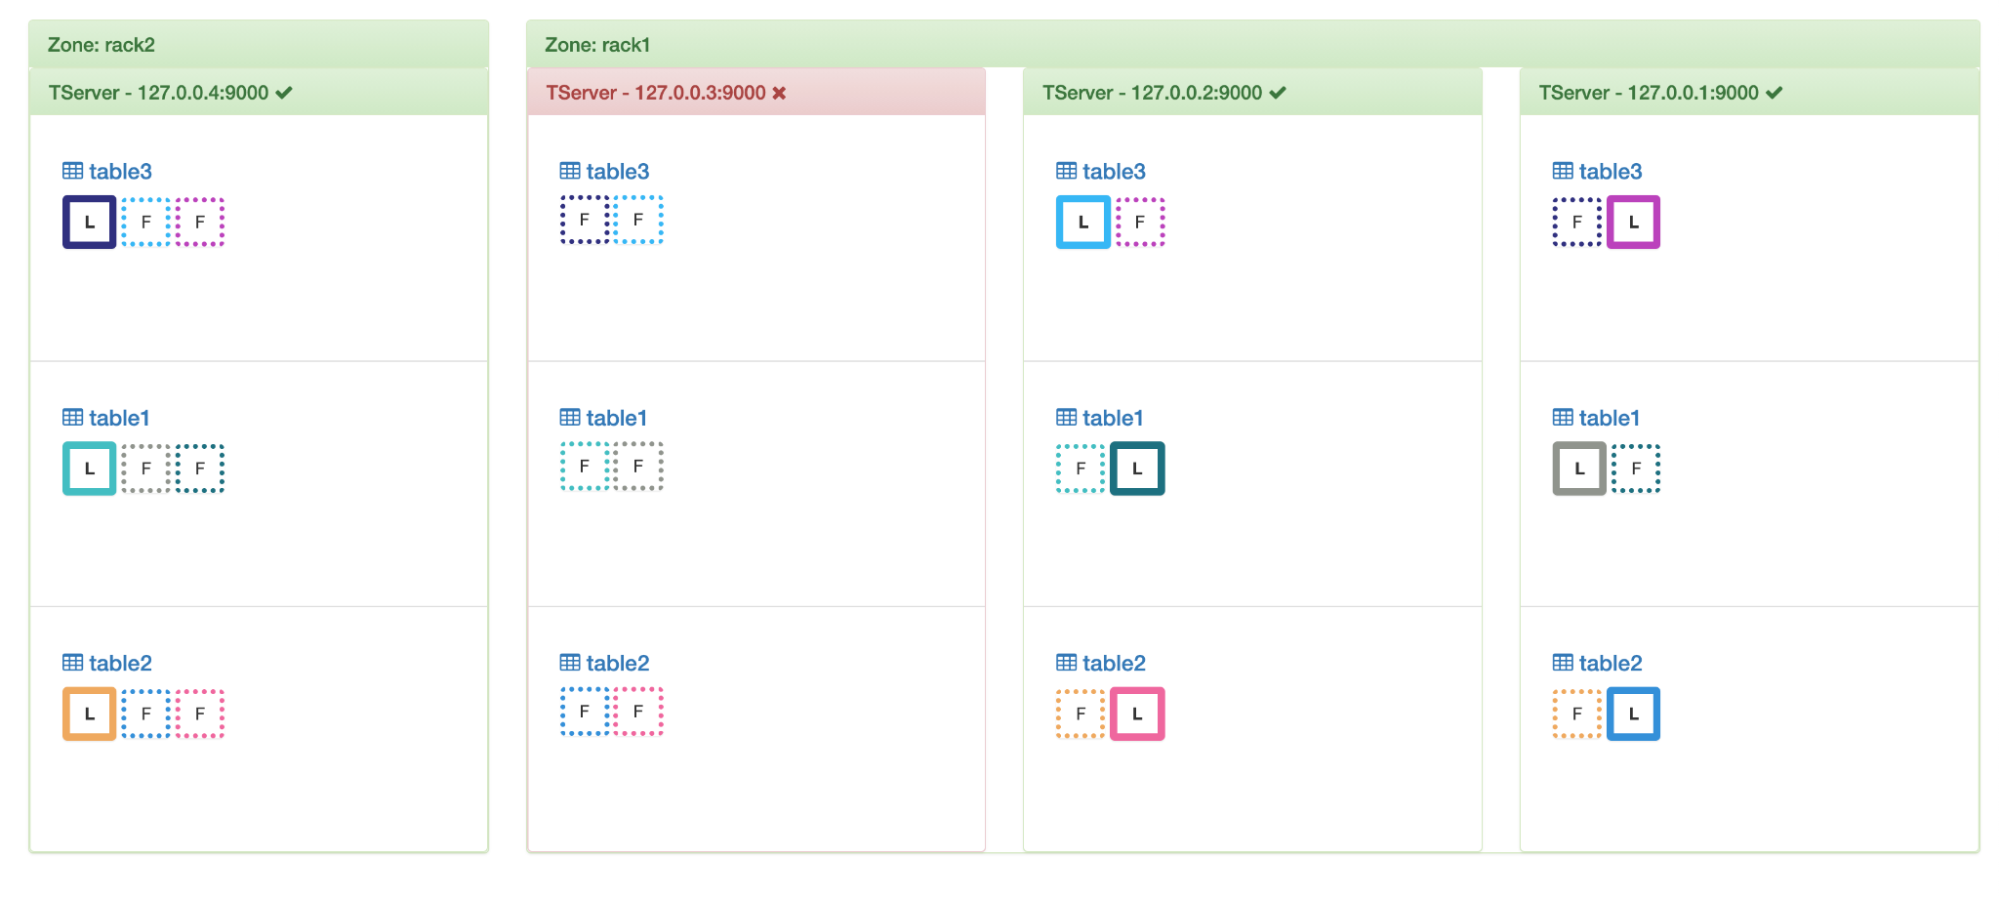
If we then change the policy to have 2 replicas in rack1 and the third replica in rack2 then we’ll be able to see the load balancer distributing loads in accordance with this policy and still balancing them.
Respecting placement policy
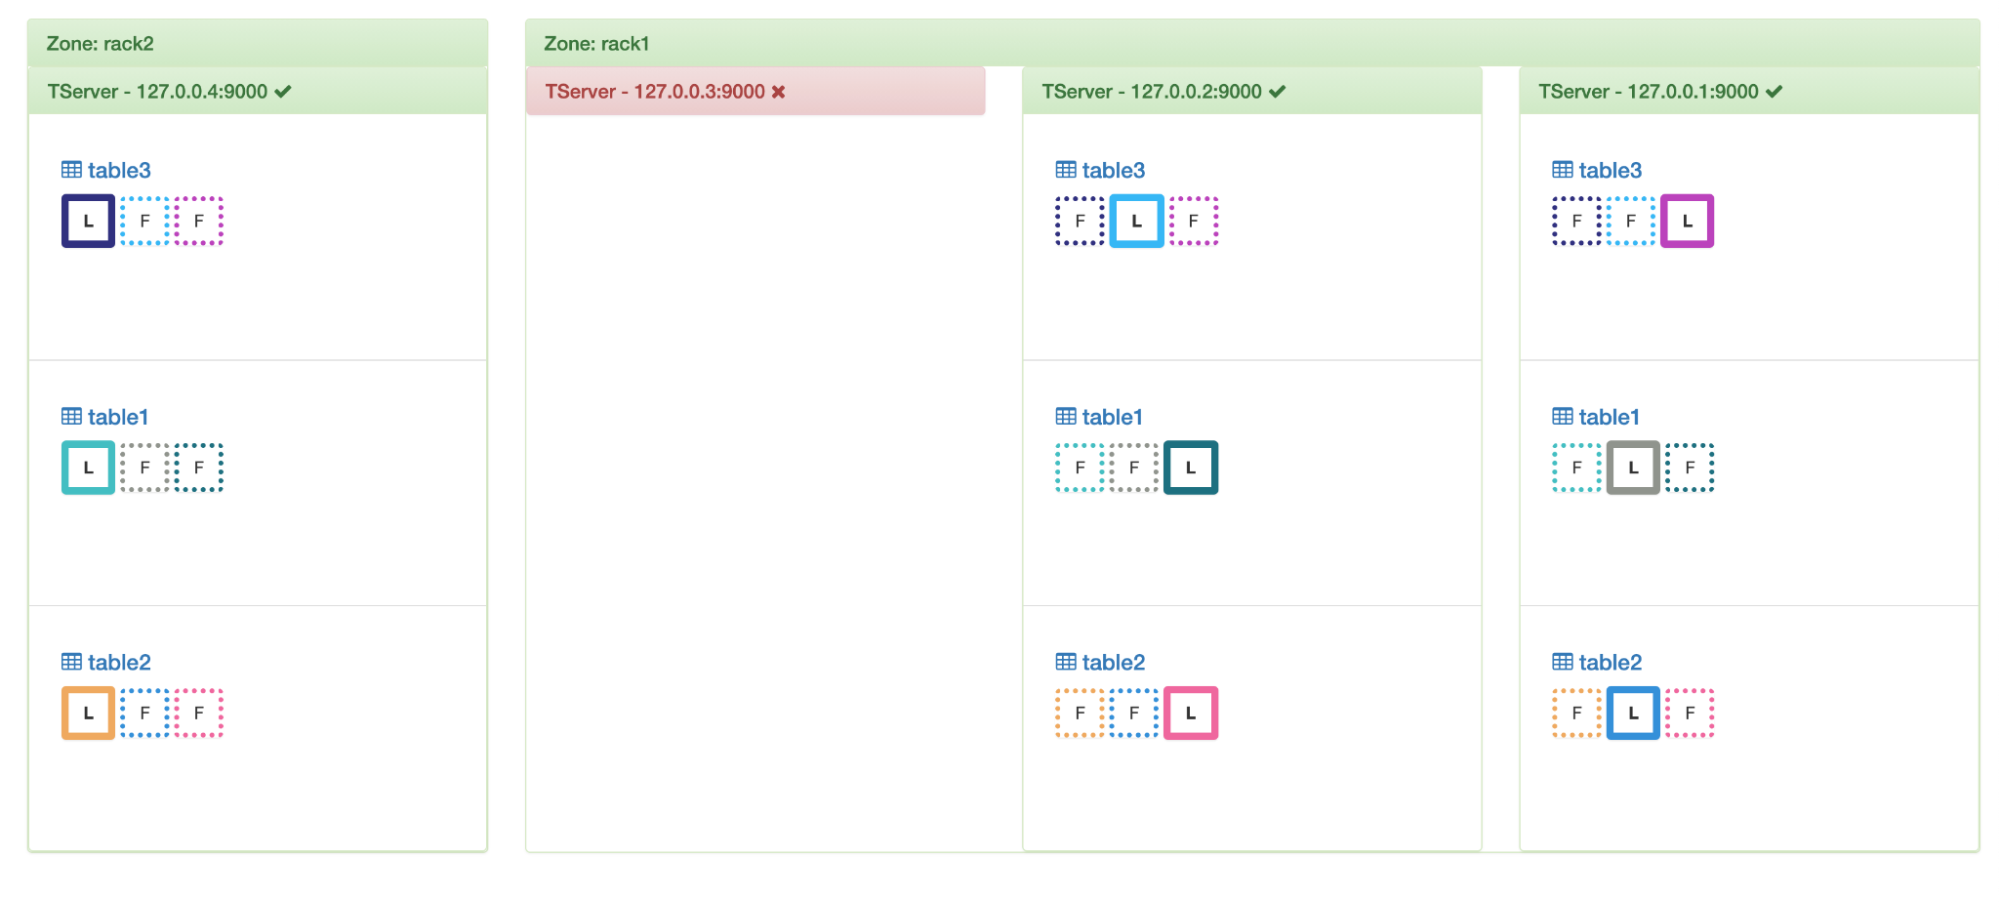
Draining traffic and data from nodes
By default all the writes and reads of a tablet go to the leader. Often-times there are scenarios when the user wants to restrict a node from getting writes and reads. This would be useful, for instance, during a rolling restart – to ensure that the node they are about to stop gracefully transfers leadership to other nodes, to minimize user app impact. In such scenarios, they would want to drain away leaders from the node without draining away the data because the node would eventually come back and start functioning normally again.
On the other hand, if they want to decommission a node knowing that it’s not coming back then draining away all the data and leadership from it would ensure graceful decommissioning.
The cluster balancer of YugabyteDB respects both these forms of draining – leadership and data.
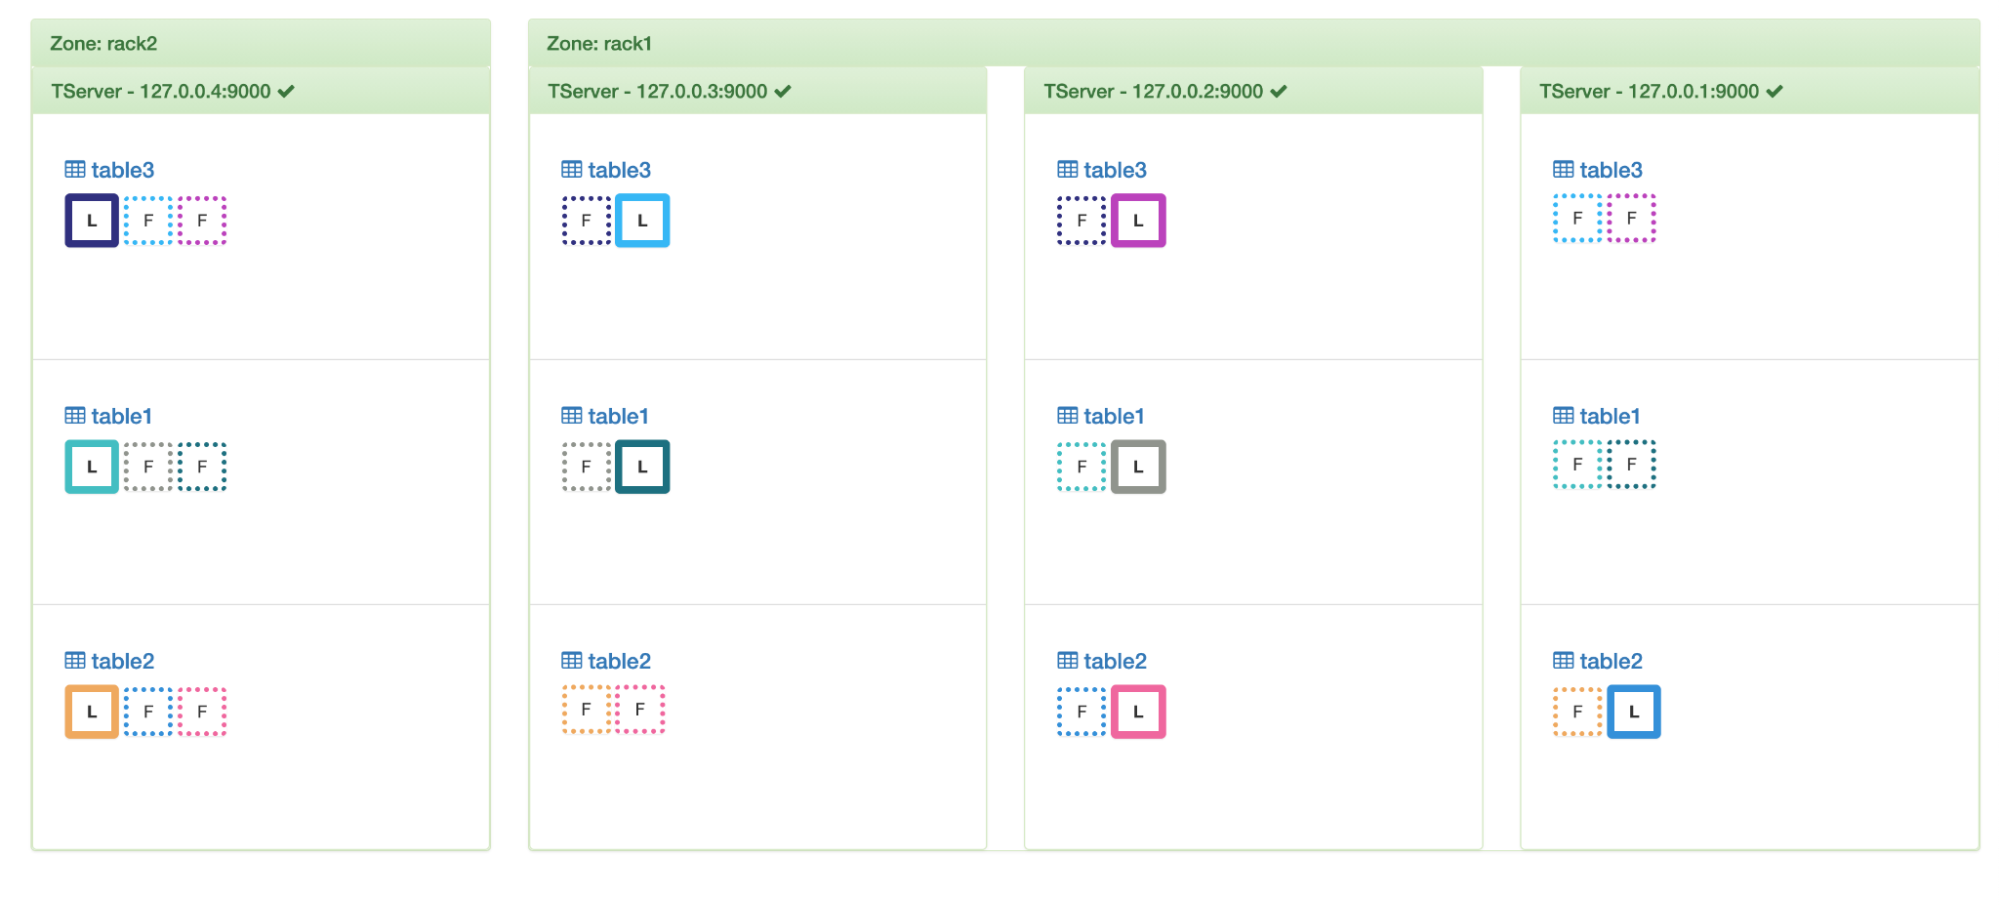
Leader Draining
If we mark node 2 for leader drainage then we can see that the cluster balancer shifts away all the leaders from it. Thus in the visual below, the boxes become dotted instead of solid.
Leader draining
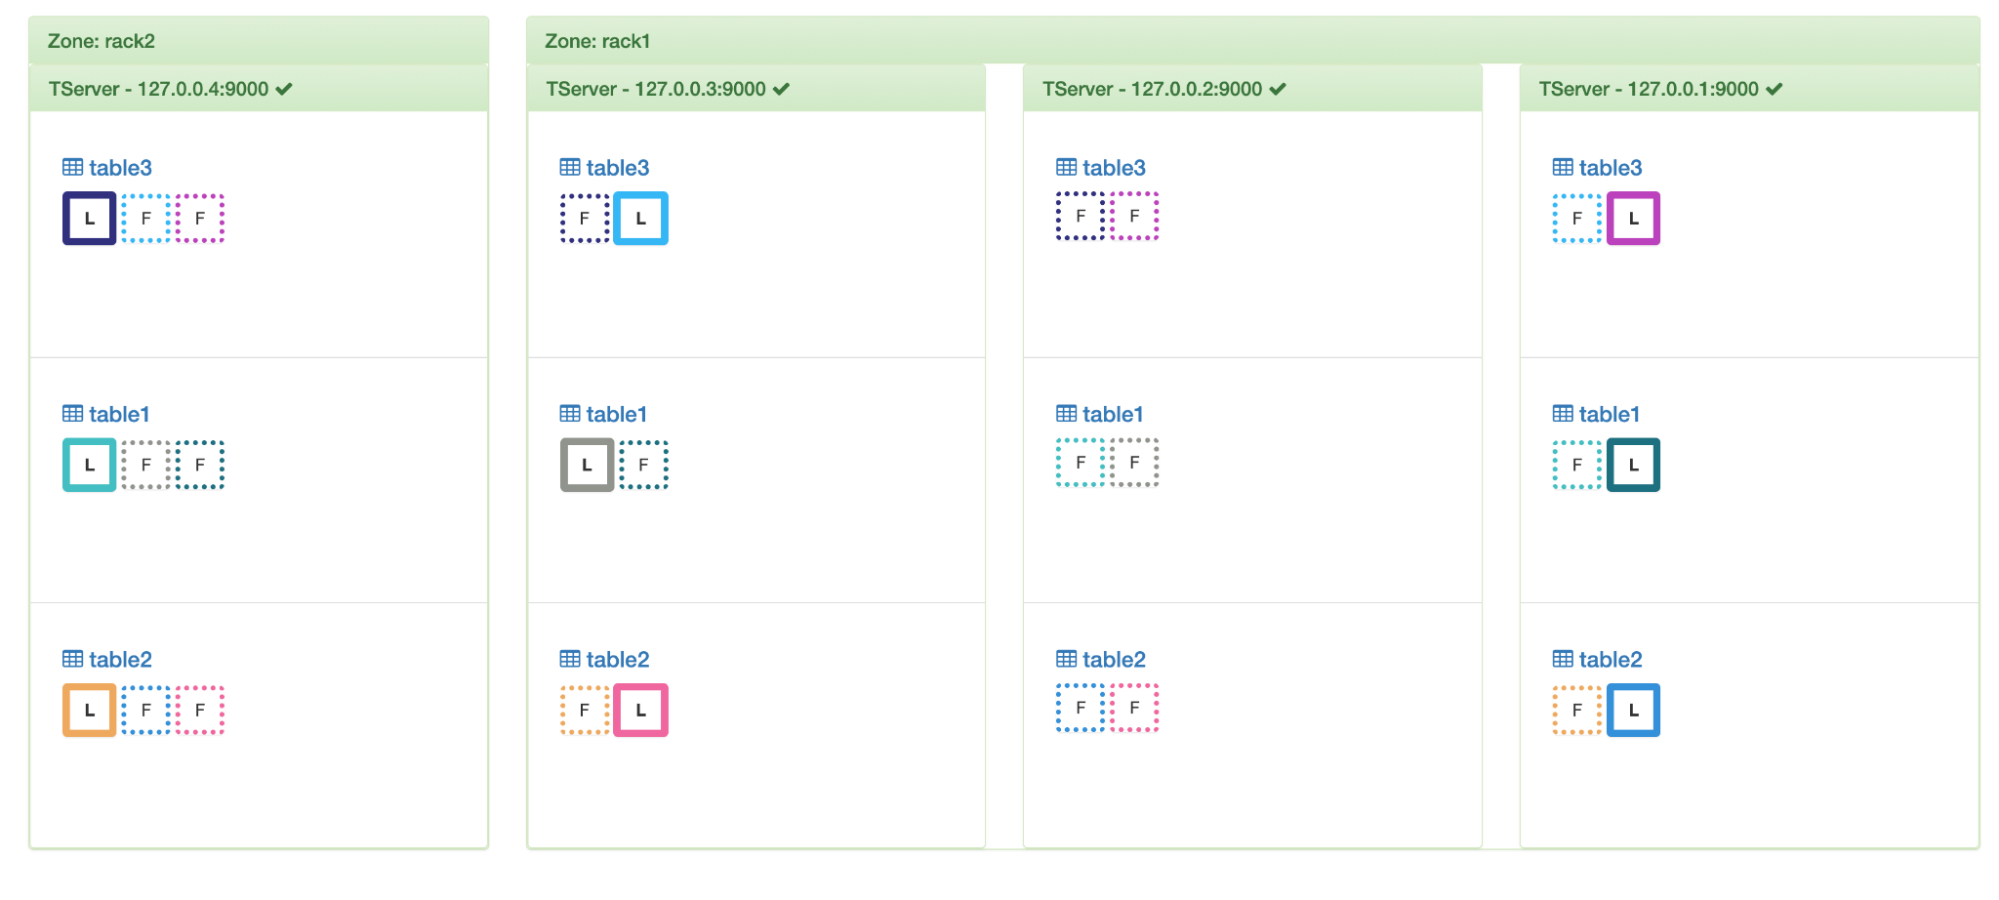
Leader and Data Draining
You can go one step further and mark a node for both leader and data draining. In such a case, the load balancer will move all the load off it and balance them amongst the others.

Leader and data draining
Let’s restore this node back to its original state by removing these drain marks.
No drainage
Rebalancing on Node Failures
If a node stops responding then it’s hard to know if it’s truly dead, or temporarily disconnected/stopped/crashed. Chances are that it will come back soon. For this reason, YugabyteDB waits for up to 15 mins before removing all the data from it. It however, moves all the leadership off this node. This behavior can be tweaked by modifying the flag “follower_unavailable_considered_failed_sec” whose default value is 15 mins. After 15 mins, the load balancer re-replicates these replicas on the other nodes and balances them.
In the above example, if we kill node 3 then we can see this in action.
Leadership transferred
After 15 mins
In addition to the above features, the load balancer also respects leader affinities, dead nodes leader balancing, prefix placement matching, colocated tables, tablespaces, etc. It also has throttles for adding or removing tablet peers, or moving leaders but they will be the subject of some other blog.
What’s Next?
The problem of hot shards doesn’t go away if the data distribution strategy doesn’t take into account the actual loads of each tablet/replica. Just the counts is not enough. Currently the load balancing algorithm doesn’t factor in aspects such as the data size of the replicas, active IOPs – an active work in progress.
In case of nodes with multiple disk drives, ensuring a proper balance of loads across these drives is also essential. We do not support per drive balancing of leaders yet. We do support basic per drive balancing of data; but there’s some future work to make sure that the data stays balanced during cluster configuration changes.
This is an area of work with a GitHub issue tracking progress: https://github.com/yugabyte/yugabyte-db/issues/7974.
Some other related tracking issues include:
- https://github.com/yugabyte/yugabyte-db/issues/3375
- https://github.com/yugabyte/yugabyte-db/issues/7977
- https://github.com/yugabyte/yugabyte-db/issues/3167
As always we are here to help and answer any questions you may have. Join us on our community Slack channel, and star us on GitHub.


