Unleash Your Real-Time Data: Discover the YugabyteDB Source Connector for Confluent Cloud
October 2, 2025
Real-time data is no longer a luxury but a necessity, and businesses require immediate insights and dynamic applications. To support these key demands, we’re thrilled to introduce the YugabyteDB Source Connector for Confluent Cloud.
This powerful connector is designed to seamlessly stream change data capture (CDC) events directly from your YugabyteDB database to the Confluent data streaming platform (built by the original co-creators of Kafka), unlocking a world of possibilities for real-time data integration.
At its core, the YugabyteDB Source Connector harnesses YugabyteDB’s robust logical replication capabilities. This allows it to capture row-level changes (every insert, update, and delete) and publish these changes as messages to Kafka topics.
The result? A consistent and reliable data stream that fuels a range of use cases, including:
- Real-time Analytics: Gain immediate insights into your operational data.
- Modern Data Warehousing: Keep your data warehouse continuously updated.
- Event-Driven Applications: Build reactive systems that respond instantly to database modifications.
In this blog, we walk through the configuration required to get you up and running with a CDC pipeline fast.
Key Features
The YugabyteDB Source Connector is packed with features designed to make your data streaming journey efficient and reliable. Highlights include:
- Real-Time Data Streaming: Gain immediate access to critical business events as data changes are streamed instantly from YugabyteDB to Apache Kafka.
- Logical Replication Foundation: Built upon YugabyteDB’s robust logical replication, this guarantees high fidelity and consistency as your data transitions from the database to Kafka.
- Ideal for Event-Driven Architectures: Perfect for constructing modern, agile applications that dynamically react to real-time database modifications.
- Effortless Data Integration: Seamlessly integrate your YugabyteDB data with multiple other systems and applications that consume from Kafka topics.
- Guaranteed Reliable Data Transfer: Engineered for unwavering reliability, ensuring that data changes are captured and delivered to Kafka without any loss, backed by an at-least-once delivery guarantee.
- Full Confluent Cloud Compatibility: Enjoy effortless deployment and management within your existing Confluent ecosystem, thanks to full compatibility with Confluent Cloud.
- Simplified Operations: Dramatically reduce the operational overhead of data integration by streamlining the process of extracting and transforming YugabyteDB data.
Step-by-Step Configuration
Getting Started with the YugabyteDB Source Connector
Follow the steps below to set up and run your YugabyteDB Source Connector.
Launch Confluent Cluster
To begin, ensure you have a Confluent cluster running.
- Refer to the Confluent Cloud Quick Start for detailed installation instructions if you’re using Confluent Cloud.
- For this example, we’ll use a local machine with a Confluent Platform setup. Remember to note your machine’s IP address; you’ll need it for the YugabyteDB Aeon allowlist in the next step.
Launch YugabyteDB Aeon Cluster
Next, set up your YugabyteDB Aeon cluster.
- Consult the YugabyteDB Aeon Quick Start for installation guidance.
- While creating your cluster, make sure you establish a new IP allow-list and add the IP address you obtained from your Confluent setup.
Create a Replication User
Log in to the YugabyteDB Aeon cloud shell. The default
adminrole has the necessary replication privileges already assigned.Create a Table
Execute the following query in the YugabyteDB Aeon cloud shell to create it:
CREATE TABLE users (id SERIAL PRIMARY KEY, name TEXT, email TEXT);
Create a Publication and Replication Slot
Using the same cloud shell, create a publication and a logical replication slot:
CREATE PUBLICATION pub FOR TABLE public.users;

SELECT * FROM pg_create_logical_replication_slot('slot_1', 'yboutput');
Create a Topic in the Confluent Cluster
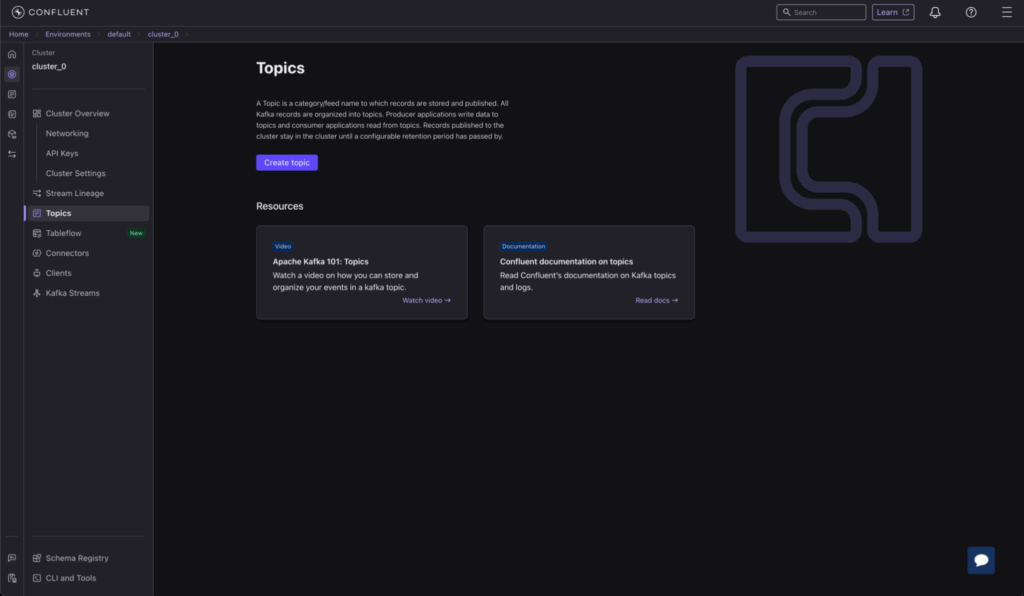
In your Confluent cluster, use the “Create topic” button to create a topic named
dbserver.public.users. Once created, your topic dashboard will display the new topic.
Start Connect Standalone Locally
Download the Confluent Platform package by following the steps in Confluent’s documentation.
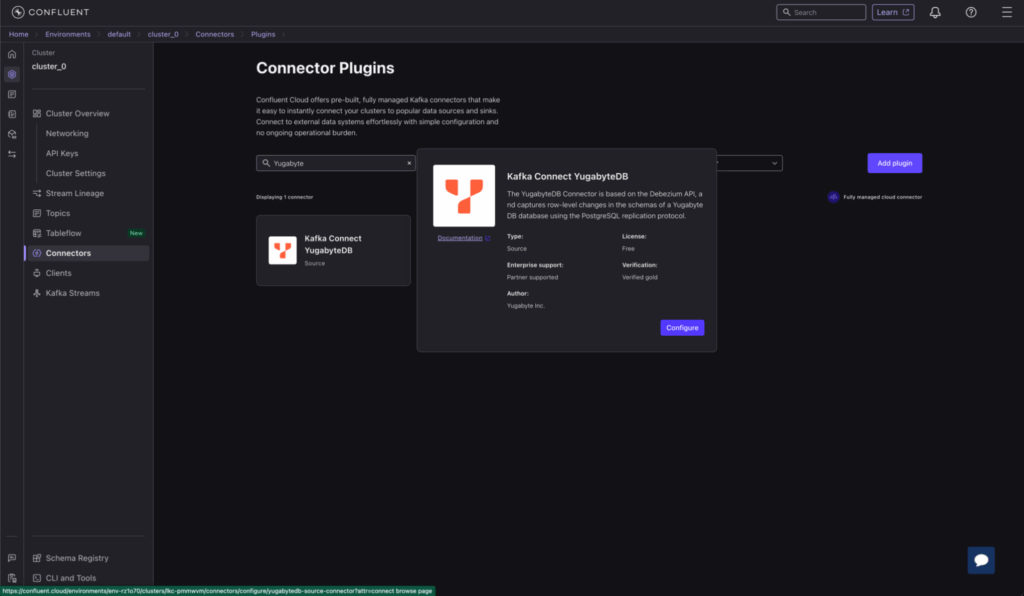
Add the Connector
Locate the Kafka Connect YugabyteDB source connector under “connector plugins” and click “Configure” to proceed.
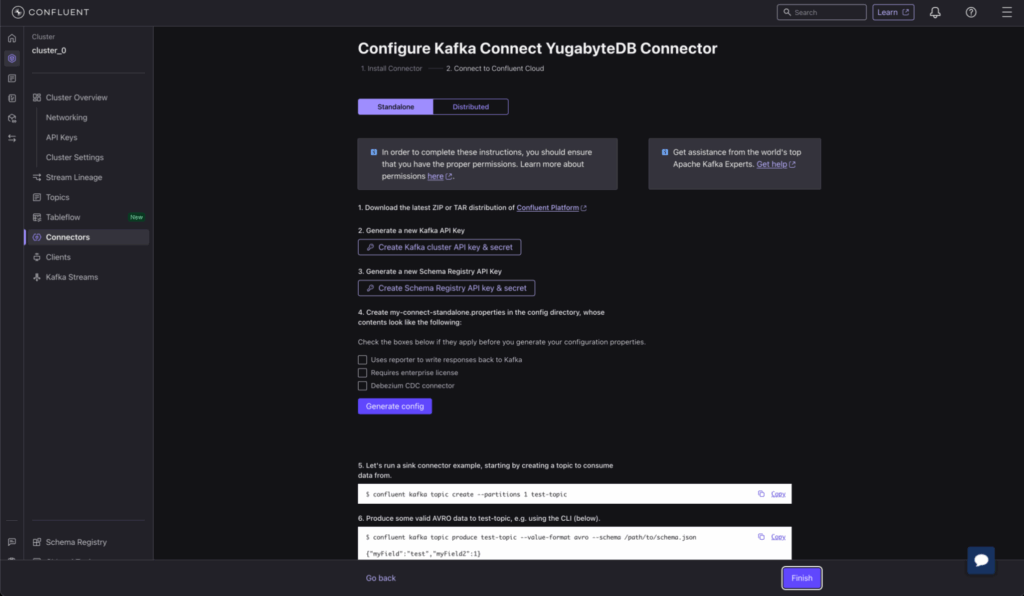
Enter Connector Details
On the configuration page, you’ll be prompted to download a properties file containing keys and secrets necessary for publishing records to Kafka on Confluent Cloud.
Click “Generate Config” to download connect-standalone.properties. This file should be stored on the same machine where you installed Confluent Platform. It will resemble the following (with redacted sensitive information):
bootstrap.servers=<redacted>

key.converter=org.apache.kafka.connect.storage.StringConverter

value.converter=io.confluent.connect.avro.AvroConverter

ssl.endpoint.identification.algorithm=https

security.protocol=SASL_SSL

sasl.mechanism=PLAIN

sasl.jaas.config=org.apache.kafka.common.security.plain.PlainLoginModule required username=<redacted> password=<redacted>;

request.timeout.ms=20000

retry.backoff.ms=500

producer.bootstrap.servers=<redacted>

producer.ssl.endpoint.identification.algorithm=https

producer.security.protocol=SASL_SSL

producer.sasl.mechanism=PLAIN

producer.sasl.jaas.config=org.apache.kafka.common.security.plain.PlainLoginModule required username=<redacted> password=<redacted>;

producer.request.timeout.ms=20000

producer.retry.backoff.ms=500

consumer.bootstrap.servers=<redacted>

consumer.ssl.endpoint.identification.algorithm=https

consumer.security.protocol=SASL_SSL

consumer.sasl.mechanism=PLAIN

consumer.sasl.jaas.config=org.apache.kafka.common.security.plain.PlainLoginModule required username=<redacted> password=<redacted>;

consumer.request.timeout.ms=20000

consumer.retry.backoff.ms=500

offset.flush.interval.ms=10000

offset.storage.file.filename=/tmp/connect.offsets

# Required connection configs for Confluent Cloud Schema Registry

value.converter.basic.auth.credentials.source=USER_INFO

value.converter.schema.registry.basic.auth.user.info=<redacted>

value.converter.schema.registry.url=<redacted>

database.history.kafka.bootstrap.servers=<redacted>

database.history.consumer.security.protocol=SASL_SSL

database.history.consumer.ssl.endpoint.identification.algorithm=https

database.history.consumer.sasl.mechanism=PLAIN

database.history.consumer.sasl.jaas.config=org.apache.kafka.common.security.plain.PlainLoginModule required username=<redacted> password=<redacted>;

database.history.producer.security.protocol=SASL_SSL

database.history.producer.ssl.endpoint.identification.algorithm=https

database.history.producer.sasl.mechanism=PLAIN

database.history.producer.sasl.jaas.config=org.apache.kafka.common.security.plain.PlainLoginModule required username=<redacted> password=<redacted>;

# Update the plugin.path in accordance to the path where the

# YugabyteDB source connector has been installed

plugin.path=/usr/share/java,/home/ec2-user/confluent-8.0.0/share/confluent-hub-components
Next, create a
source-connector.propertiesfile with the following configuration for your connector deployment:name=yb-source-connector tasks.max=1 connector.class=io.debezium.connector.postgresql.YugabyteDBConnector topic.prefix=dbserver database.hostname=hostNameFromYugabyteDBAeon database.port=5433 database.user=admin database.password=passwordFromYugabyteDBAeon database.dbname=yugabyte snapshot.mode=never plugin.name=yboutput table.include.list=public.users slot.name=slot_1 publication.name=pub database.sslmode=require
Launch the Connector
Use the following command to launch the connector locally from the location where Confluent is installed:
/bin/connect-standalone <path-to-connect-standalone.properties> <path-to-source-connector.properties>
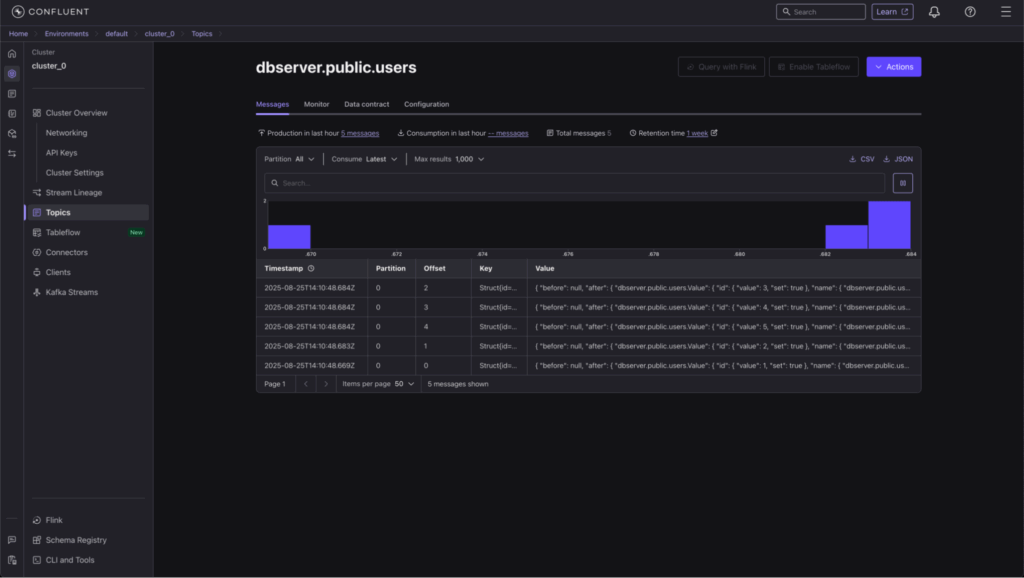
Perform operations and check messages
INSERT INTO users VALUES (generate_series(1,5), 'Demo Name', 'demo@example.com');
Next Steps
We encourage you to try out the new connector and experience it for yourself! This documentation provides more details on how to get started.
We are excited about the possibilities this new connector brings and look forward to seeing how our customers leverage it to streamline their data ingestion processes. You can find out more about YugabyteDB Source Connector for Confluent Cloud on our partner page.
Want to know more about building GenAI apps on a PostgreSQL-compatible database? Download our solution brief to discover basic AI concepts, architectural considerations, and hands-on tutorials that demonstrate how to build your first GenAI applications.