Getting Started with DBeaver on a Distributed SQL Database
Editor’s note: Updated July 7, 2020 with the new DBeaver wizard
If you’re a database developer, you know that you need different SQL statements for creating schemas, ad-hoc querying, initiating backups, or troubleshooting. For these scenarios, finding the right graphical tool can speed up these tasks and make you more productive. Over the years, the PostgreSQL community has developed several open source graphical tools for managing PostgreSQL databases, visualizing the datasets it contains, and running queries. You can find a comprehensive list of tools on the PostgreSQL wiki here.
This post is the first in a series of on-going blogs that will show you how to work with YugabyteDB using popular PostgreSQL GUI tools. (Additional posts in the series include: DataGrip from JetBrains, DbSchema, TablePlus, PGAdmin, and SQL Workbench/J.)
What’s YugabyteDB? It is an open source, high-performance distributed SQL database built on a scalable and fault-tolerant design inspired by Google Spanner. YugabyteDB is PostgreSQL wire compatible and supports advanced RDBMS features like stored procedures, triggers, and UDFs.
What is DBeaver?

DBeaver is a free multi-platform database management tool for developers, SQL programmers, DBAs, and analysts. It is written in Java, and supports a variety of databases including MySQL, PostgreSQL, MariaDB, and even YugabyteDB! In addition to the databases mentioned, there are plugins and extensions for many other data products that support the JDBC driver.
In a nutshell, DBeaver gives you all the must-have features you’d expect from any database GUI tool including:
- A connection and metadata browser
- SQL query editor and executor
- A rich in-line data editor
- Entity relationship (ER) diagrams
DBeaver is intuitive and there are a lot of helpful tips that can aid you in configuring and exploring your database seamlessly.

Prerequisites
Before we get into DBeaver, you’ll need to setup YugabyteDB and install a sample database. For the purposes of this blog post we’ll be using the northwind sample database. The instructions for how to get up and running in just a few minutes can be found in our previous blog post, “The Northwind PostgreSQL Sample Database Running on a Distributed SQL Database.”
Please note that for the purposes of this blog post we’ll be focused on getting up and running on a Mac, but DBeaver supports all the major operating platforms.
Installing DBeaver
Download and Install DBeaver
First thing to do is download the latest version of DBeaver. DBeaver comes in two editions – Community and Enterprise. In this blog post, we are installing DBeaver community edition version 7.1.2 on Mac.
Working with DBeaver
Launching DBeaver
Once you are installed, let’s launch DBeaver and configure a connection to YugabyteDB. If it is a fresh install, DBeaver will walk you through a wizard to get your connection set up like shown below.
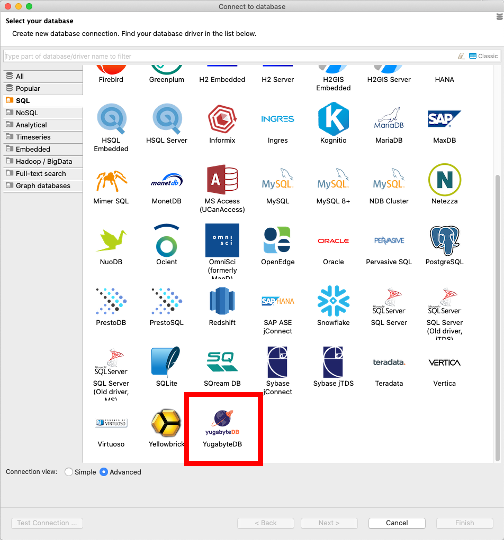
For the purposes of this how-to, I’ve selected the northwind sample database. Similar to PostgreSQL, password authentication for the default yugbayte user is disabled, and hence no password should be specified.

It’s always a good idea to test the connection before proceeding.

Database Navigator
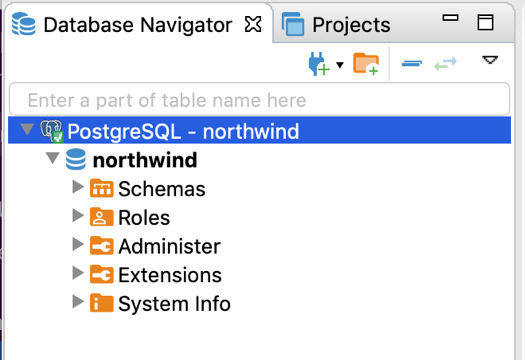
After the connection is setup you should be able to explore YugabyteDB (aka “PostgreSQL – northwind”) using the database navigator as shown below:
Working with the Northwind Sample Database
That’s it! You are ready to start exploring the northwind database running on a distributed SQL backend using DBeaver.
View Database Objects
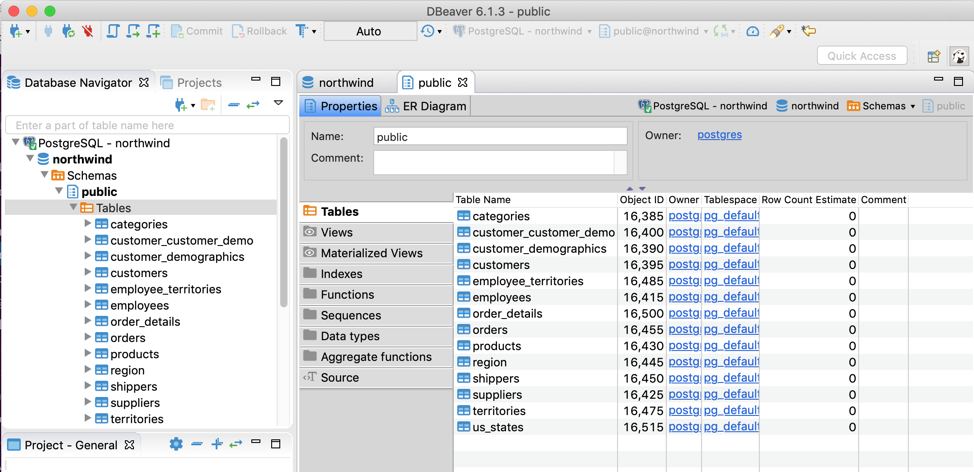
By expanding out northwind > schemas > public > tables you can quickly visualize all the tables in the northwind database.
Querying Data
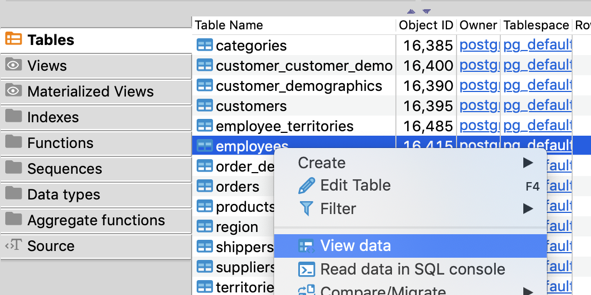
You can quickly view and edit the data in a table by right-clicking on the table and selecting view data.

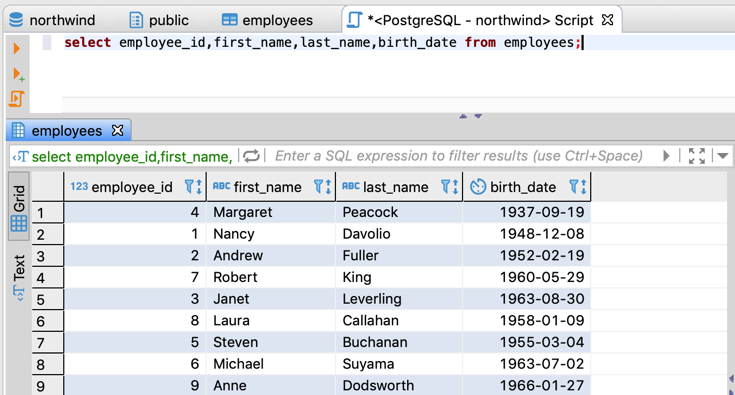
If you want to try your hand at writing your own SQL queries, you can do that by clicking on the SQL Editor button. You can now create, run, and view the results of your query in this window.
There’s a ton more development and administrative capabilities inside of DBeaver. Make sure to check out the DBeaver.io site to dig into how all their various features work.


